Process presets, cues and automations
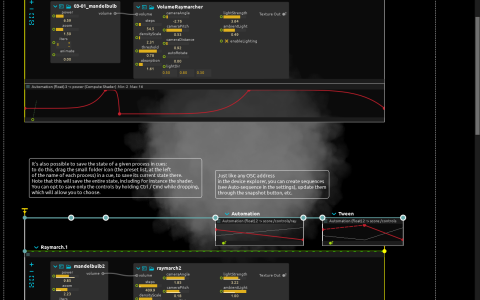
Two branches generate a Mandelbulb density volume in a Compute Shader and render it with VolumeRaymarcher. This is score’s native compute/ISF shader pipeline, not Qt Quick 3D. The shaders originate in the score-csf-testers library package, under shaderlib/volume/03-fractals/03-01_mandelbulb.cs and shaderlib/renderers/VolumeRaymarcher.fs.
Compare the approaches
- Start playback and trigger
Raymarch. Its looping automation is cabled directly to the first Mandelbulb shader’s power input. The raymarcher sends the image toWindow:/. - Stop that branch with its end trigger before starting
Raymarch.1, since both write to the same window. The second branch exposes its processes asmandelbulb2andraymarch2in the Local device. - Trigger the standalone cues to recall different fractal and camera settings. The connected cue sequence also changes them over time. Its
Automationinterval writesscore:/controls/raymarch2/cameraangleandscore:/controls/raymarch2/cameradistance. - Compare the following
Tweeninterval: its automation curves have Tween enabled, using the current parameter value at the start rather than jumping to the curve’s initial value.
To make a new cue, drag a process’s preset-folder icon into a state. This can store the complete process state, including shader code; hold Ctrl/Cmd while dropping to choose a controls-only snapshot. To automate one inlet, right-click it and choose Create automation, or drag the port into another interval.
A graphics backend capable of the compute shader is required. No external model or media file is used. The Local device’s saved OSC and WebSocket ports are 6666 and 9999; these are only needed for remote control, not for the internal cue sequence.