Audio techniques
Playing a sound file
To play a sound file, drag’n’drop it in the score, from the library, or from your operating system.
If you don’t hear a sound, check that :
- The time cursor is increasing (if not, that means that the sound card is not properly configured).
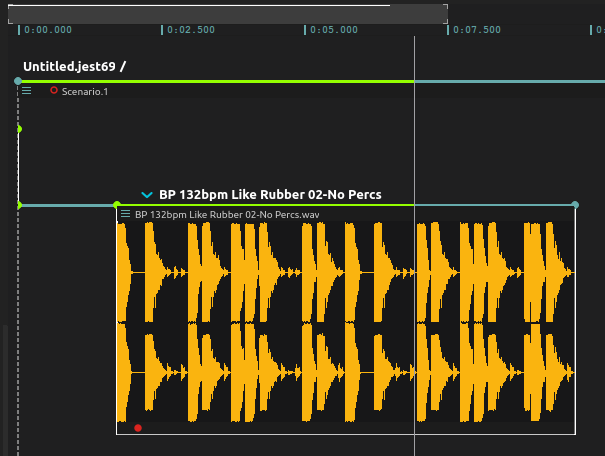
- The sound file is linked to the beginning of the score via an interval.
It should look like this:
Applying an effect
To apply an effect to a sound file:
- Drop it from the process library to the sound file interval.
- Connect a cable from the audio file output to the effect input. Now the sound will be routed entirely through the effect.
- Add more effects in the same manner, by connecting the output of the previous effects to the input of the following ones !
Applying an effect to multiple audio files
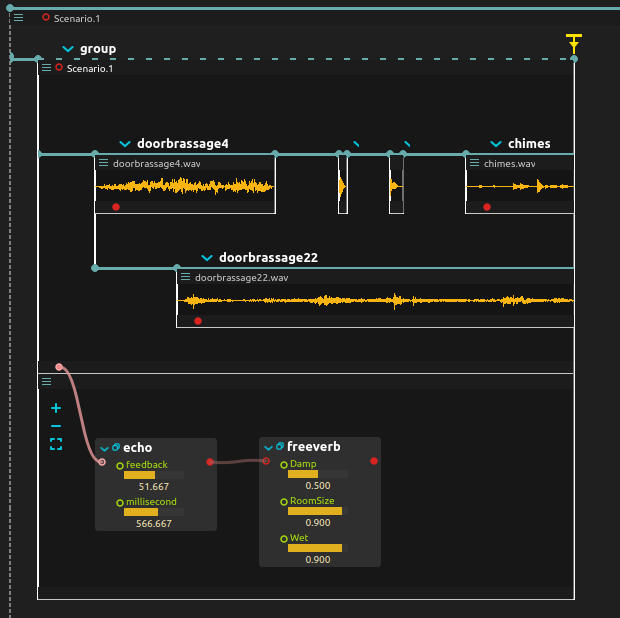
To apply an effect to multiple files, it would be possible but unwieldy to connect a cable from each file to the audio effect.
Instead, we can group them in a single scenario, and rout the scenario’s output to the audio effects:
Fade-ins and fade-outs
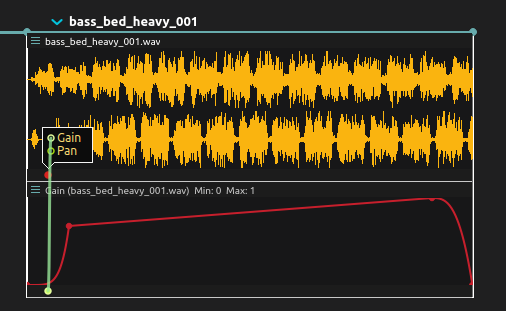
Every audio outlet has a “gain” sub-outlet which can be used to perform fades.
- Press the audio outlet.
- Right-click on the “gain” port.
- Select “Create automation”.
The created automation can then be used to adjust the volume of that output in time.
Analysing an audio signal
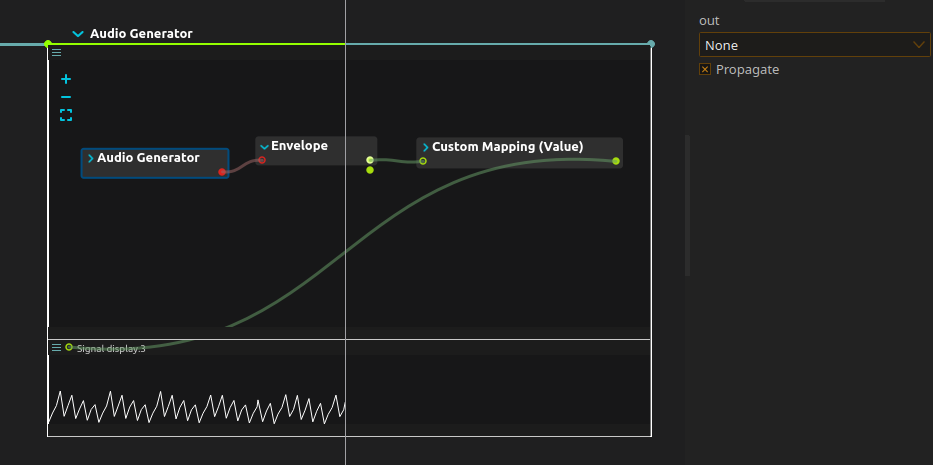
score provides a simple envelope analyzer. Combined with the signal display process, this allows to visualize a signal in the time-line.
- Add an envelope process (Audio > Envelope).
- Add a signal display process (Monitoring > Signal display)
- Route the audio output to the input of the envelope process.
This means that the entire audio is routed to the envelope process, and thus won’t be heard anymore. To prevent this, check “Propagate” in the audio outlet inspector.
- Route the envelope output to the signal display input. The first output measures RMS, the second measures peak values.
- If the signal is too low, add a Custom Mapping process between the envelope and the signal display, in order to multiply it by some factor meaningful for your signal.
Sound spatialization
score allows arbitrary numbers of audio channels to go through its ports.
This makes it possible to use it for instance with large speaker arrays, domes, etc.
A simple and efficient 2D spatialization algorithm is provided with the Faust spat preset (which uses the spatialization method devised by Laurent Pottier).
By default, it will spatialize a mono source on a 8-channel circular loudspeaker array.
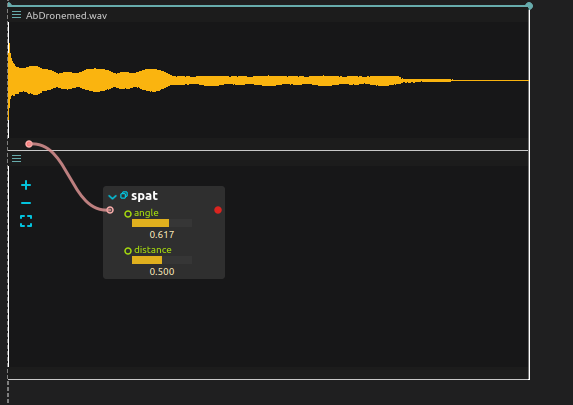
It is possible to edit the Faust script, to change the number of loudspeakers:
- Press the “Window” icon next to the Faust process name, to open its editor.
-
Edit the following line with the number of wanted loudspeakers instead of
8:process = vgroup("Spatializer 1x8", sp.spat(8, angle, distance)); - Press “Compile”. The Faust process will be compiled and updated automatically.
Using live audio input
To use a live audio input in a part of the score, follow these steps:
- Set-up the audio device in the device explorer.
- Drag’n’drop the input address to use as an input of a sound effect.
In the following example, a stereo bus receiving a stereo guitar signal has been created. It is sent to a reverb.
Applying global audio effects
As mentioned in audio-routing, mixing is by default hierarchical: objects mix their output in their parent object.
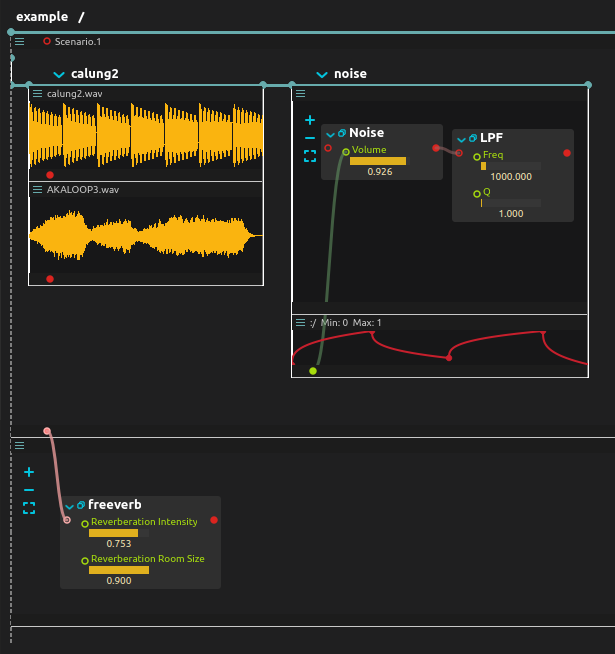
In general, most scores will be built around a top-level scenario, which will contain all the structures:
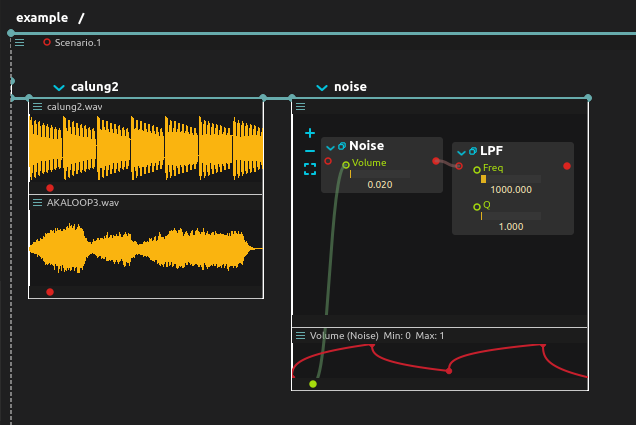
This scenario is no exception to the rule: if you scroll at the bottom of the score, you’ll notice it comes with an output audio port, too.
In this example, we reduce its slots’s height so that it is visible:
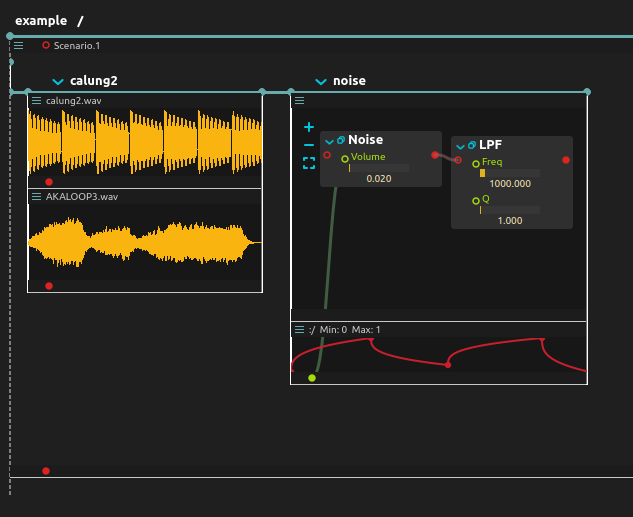
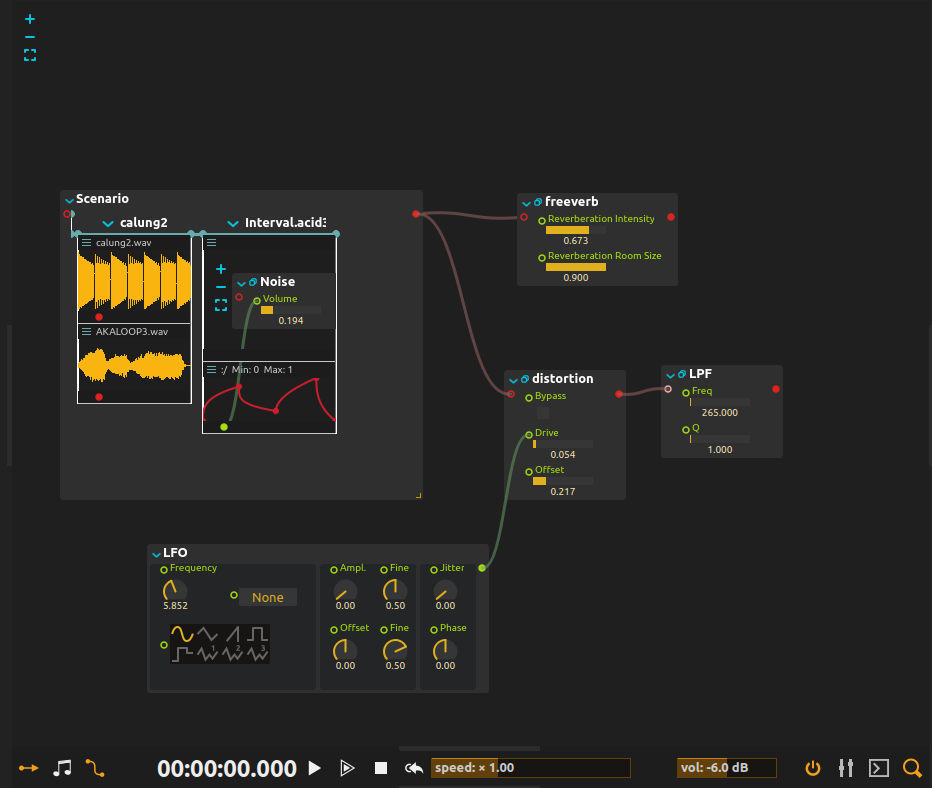
It is then possible to connect the output of this scenario to another process, to apply a global audio filter:
If complex filtering is necessary, it is of course possible to switch into the nodal view to create advanced effect routings:
