Automation (float)
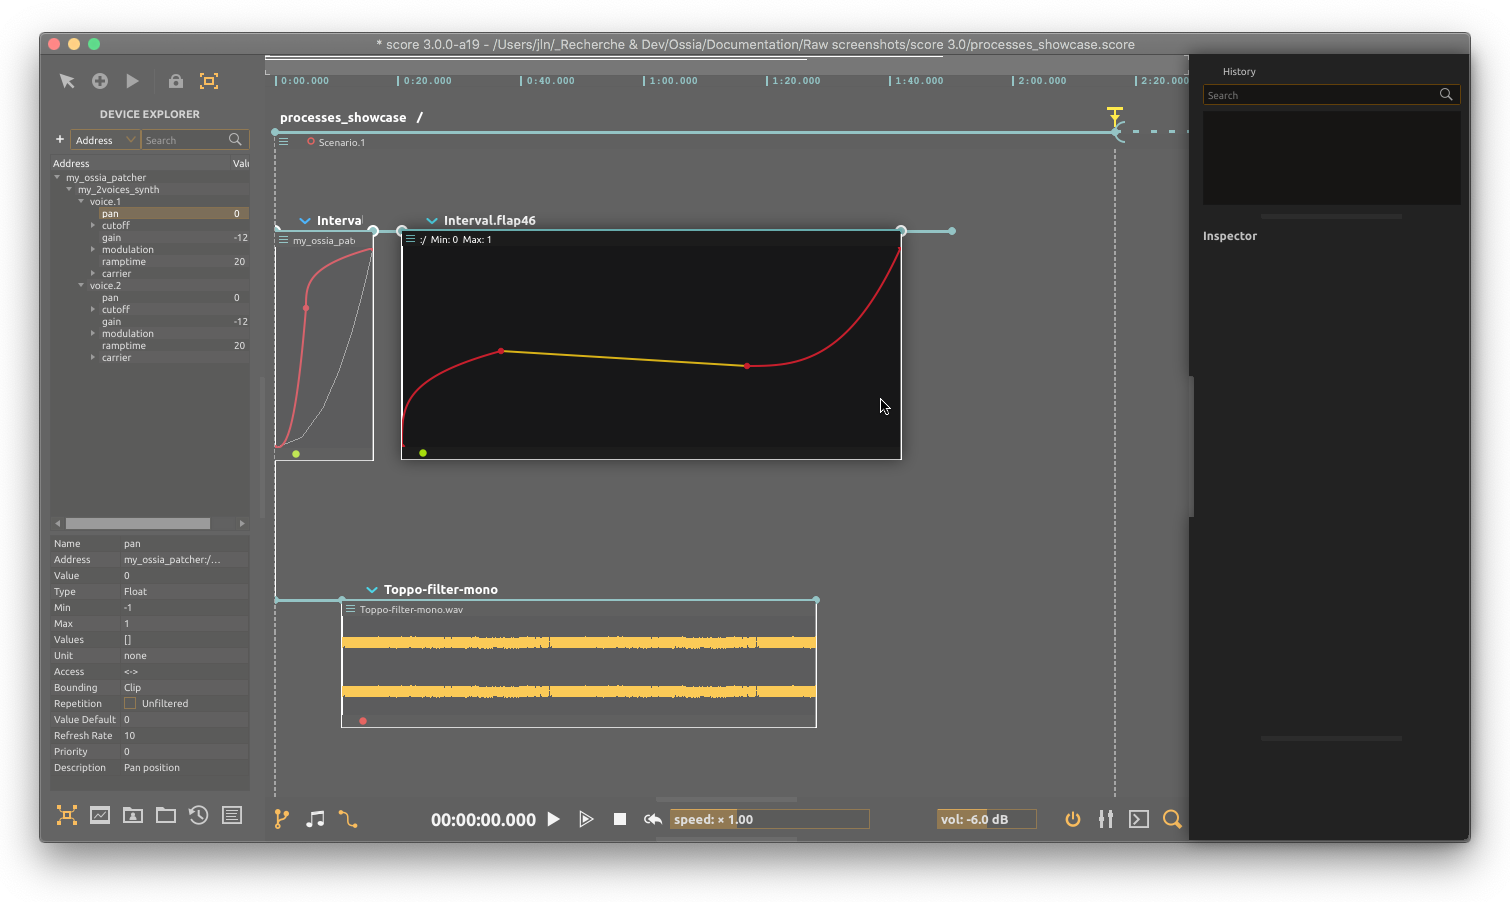
The Automation (float) process allows to control single value parameter using a breakpoints function.
Basic editing
Create new points on curve
Multiple points can be added on an automation. To add a point, double-click in the automation slot to create a point under the mouse cursor.

You can also create a new point using Ctrl+click(Win / Linux) or⌘+click(Mac) in the automation’s slot.
Remove points from curve
To delete a point from an automation, click on a point to select it, then from its contextual menu select Remove.

Multiple points and attached segments can be selected and removed at once using the
Removecontextual menu entry.
Edit points
To edit a point value of position in time, select it using the mouse and move it along the x axis to adjust in position in time, or along the y axis to adjust its value. You will note that when selecting a point, its value gets displayed next to the mouse cursor
For fine control, you can also use the dedicated number boxes from the inspector. Click on a point to select it and display its inspector then use the value number box to adjust to the desired value.

Adjust segment’s curve
Power type segments (default) can be added a curve factor. To do so, click a segment and use Shift+Drag. Dragging the curve upward add a log-like curvature to the segment, while dragging downward add a exp-like curvature.
Segment shapes
Segments between two points can be set to various predefined shapes. To do so, click a segment and from its contextual menu, choose the desired segment shape in the Type category.
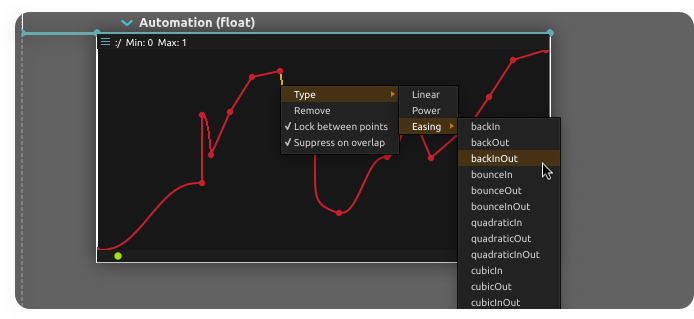
Shapes include:
-
Power(default) -
Linear(a slightly optimized version ofPowerwith zero curve factor) - Standard Easing curves
| backIn | quadraticIn | quarticIn | sineIn | exponentialIn |
| backOut | quadraticOut | quarticOut | sineOut | exponentialOut |
| backInOut | quadraticInOut | quarticInOut | sineInOut | exponentialInOut |
| bounceIn | cubicIn | quinticIn | circularIn | elasticIn |
| bounceOut | cubicOut | quinticOut | circularOut | elasticOut |
| bounceInOut | cubicInOut | quinticInOut | circularInOut | elasticInOut |
| PerlinInOut |
Freehand function
Automation’s function can be hand-drawn using Alt+Drag in Automation editor. Drawn function will get optimized and transformed onto a beak-point function on mouse release so you can edit various points individually.
Advanced edits
Lock between points
By default, moving a point in the automation is limited horizontally by previous and next points’ position in automation. This can be turned on and off using the Lock between points option in the automation contextual menu.
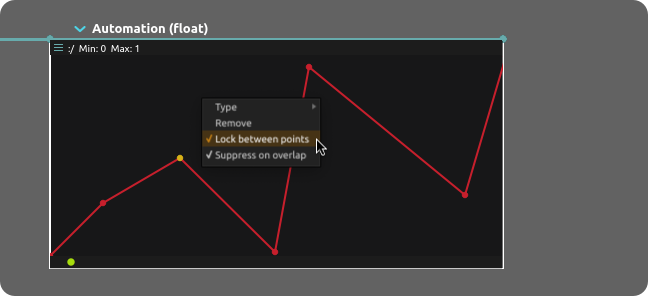
When off, points can be freely moved along the whole automation’s slot.
Suppress on overlap
When Lock between points option is unset, crossing adjacent points can be handled in two different ways.
By default, crossing an adjacent point in automation will remove this point. This can be turned off using by unsetting the option in the automation’s contextual menu.
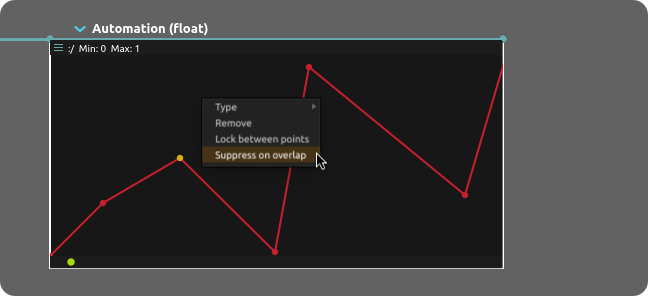
When off, moved point will get inserted at its new position without removing other points in automation.
Tween mode
Tweening allows an automation to ramp smoothly from the running value of an address which was assigned to, during the first segment.
This means that, assuming an OSC address /foo, if tweening is enabled, no matter the visual “start value” of the first point of the automation curve, the actual first point during execution will be taken from the value of /foo when the score reaches that part. This allows smooth transitions from a live control, to a scripted one.