Processes
score comes with a number of included processes. These cover various needs of action for advanced parameter control.
This section of the manual covers the general usage of Processes as well a detailed documentation of each included Processes.
General description
score allows to handle a number of actions evolving either through some amount of time, or at a single instant. These processes can either be actions evolving during a given duration, such as automation of a given device’s parameter, or actions activated only in a defined duration, such as mapping or LFO modulations.
Processes are attached to an interval in the scenario when they represent an evolving behaviour, and to a state when they are instantaneous.
Basics
Create processes on intervals
Using drag & drop
From the Device explorer
Processes can be created by drag & dropping parameters from the Device explorer onto an existing interval in the scenario. The interval to which processes will be attached turns to yellow as the mouse with selection hovers it.
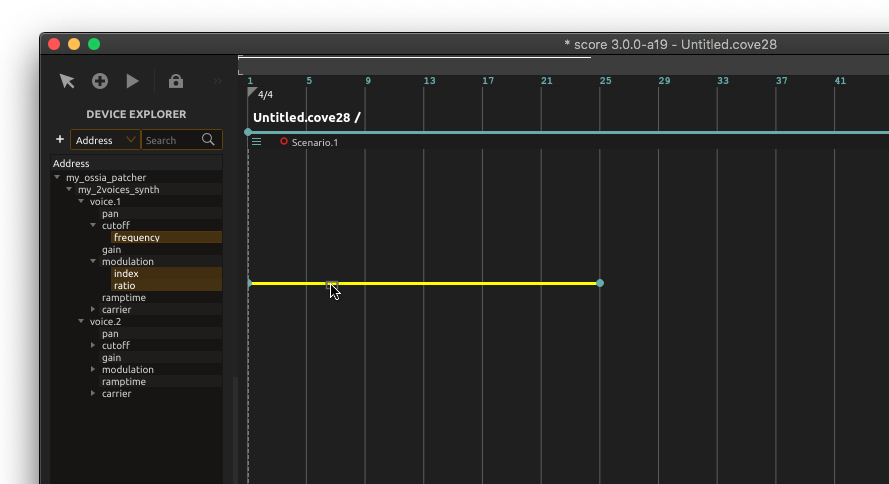
The Device explorer selection may contain one or several parameters. When multiple parameters are dropped, processes get stacked in different layers.
From the libraries
Processes can also be created by drag & dropping the desired process from the Process library or the User library in the scenario. When doing so, score automatically creates the interval to which process will get attached.
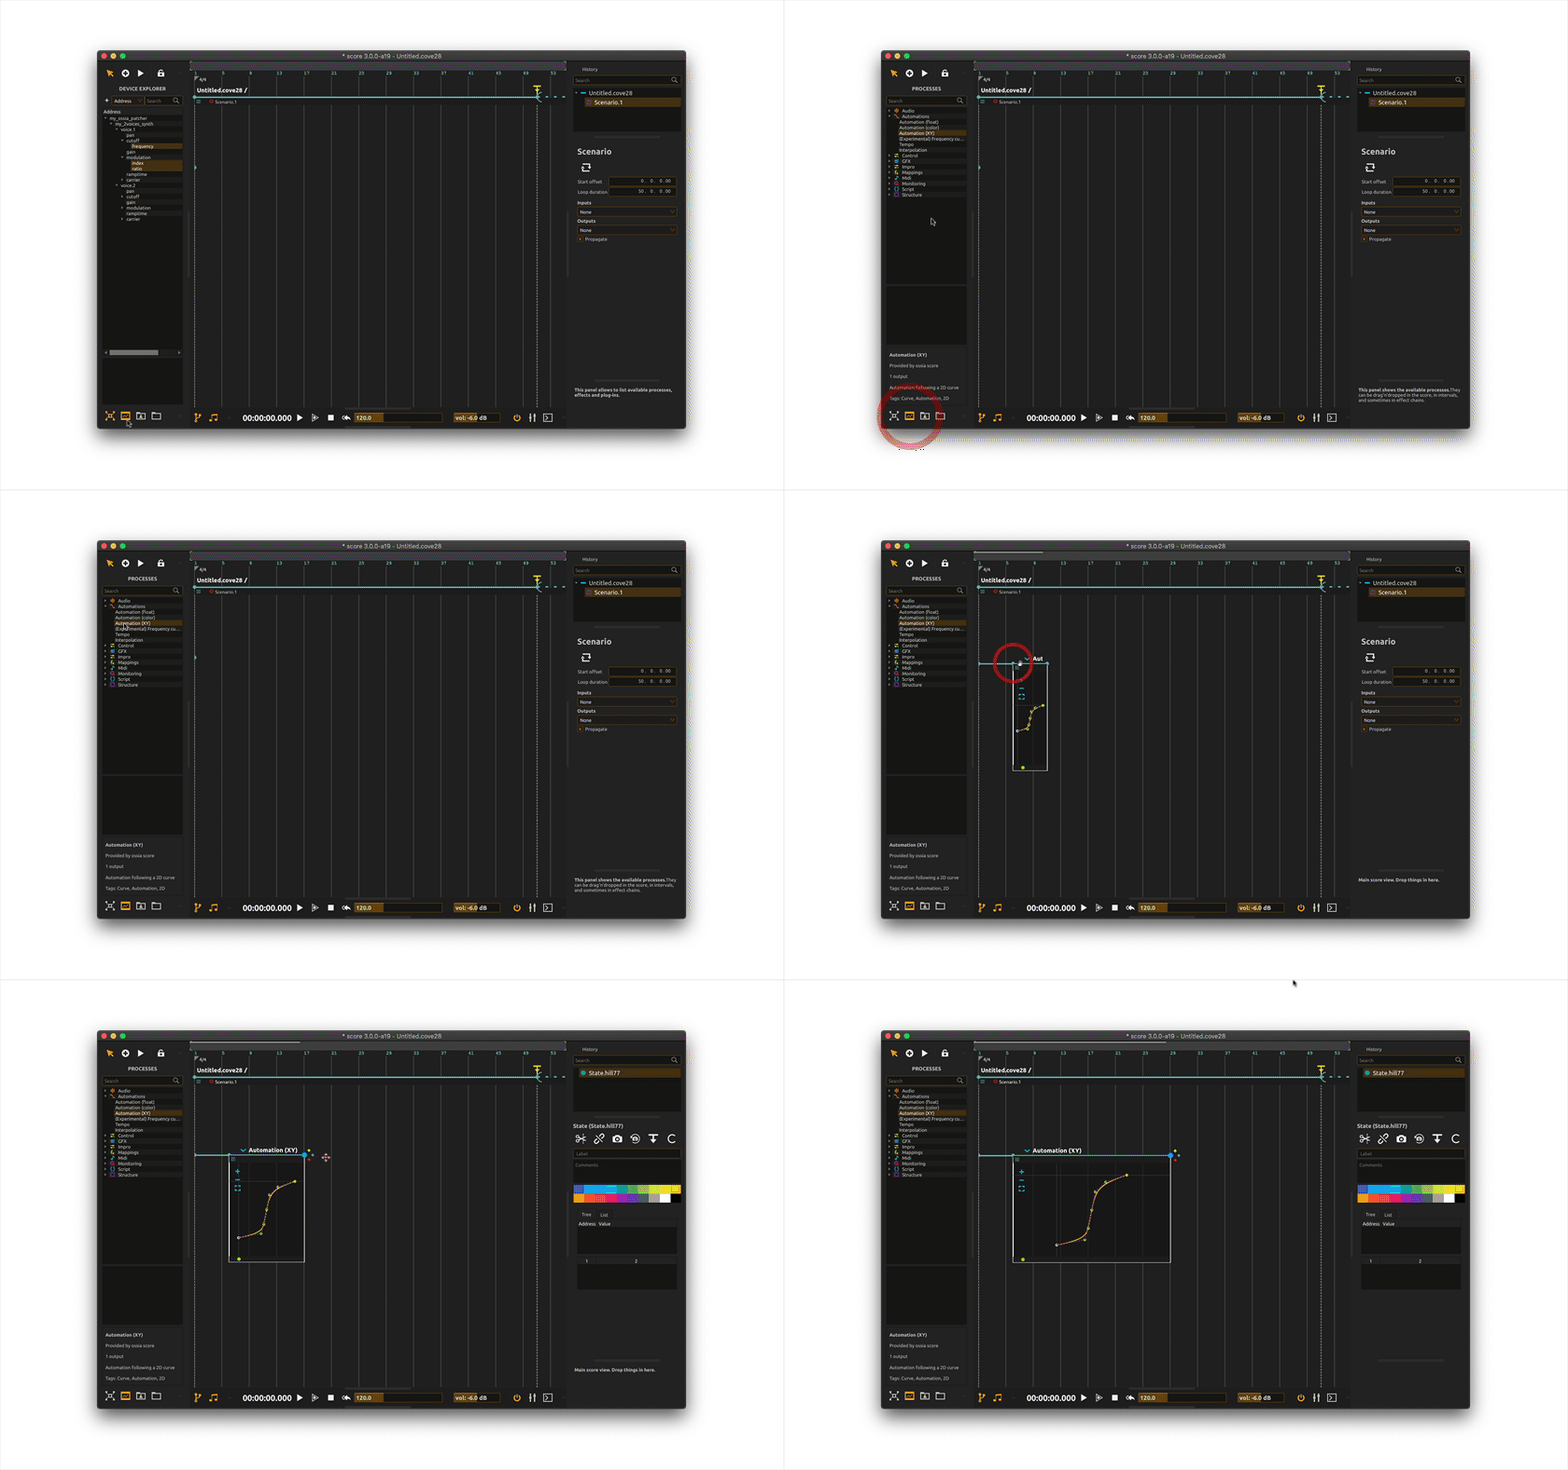
You may as well drop a process onto an existing interval.
Note that both namespace selection and processes selection can be dropped onto an interval to which some processes are already attached. Depending on the type of processes, these may be created on top of processes already in place or at a slot below.
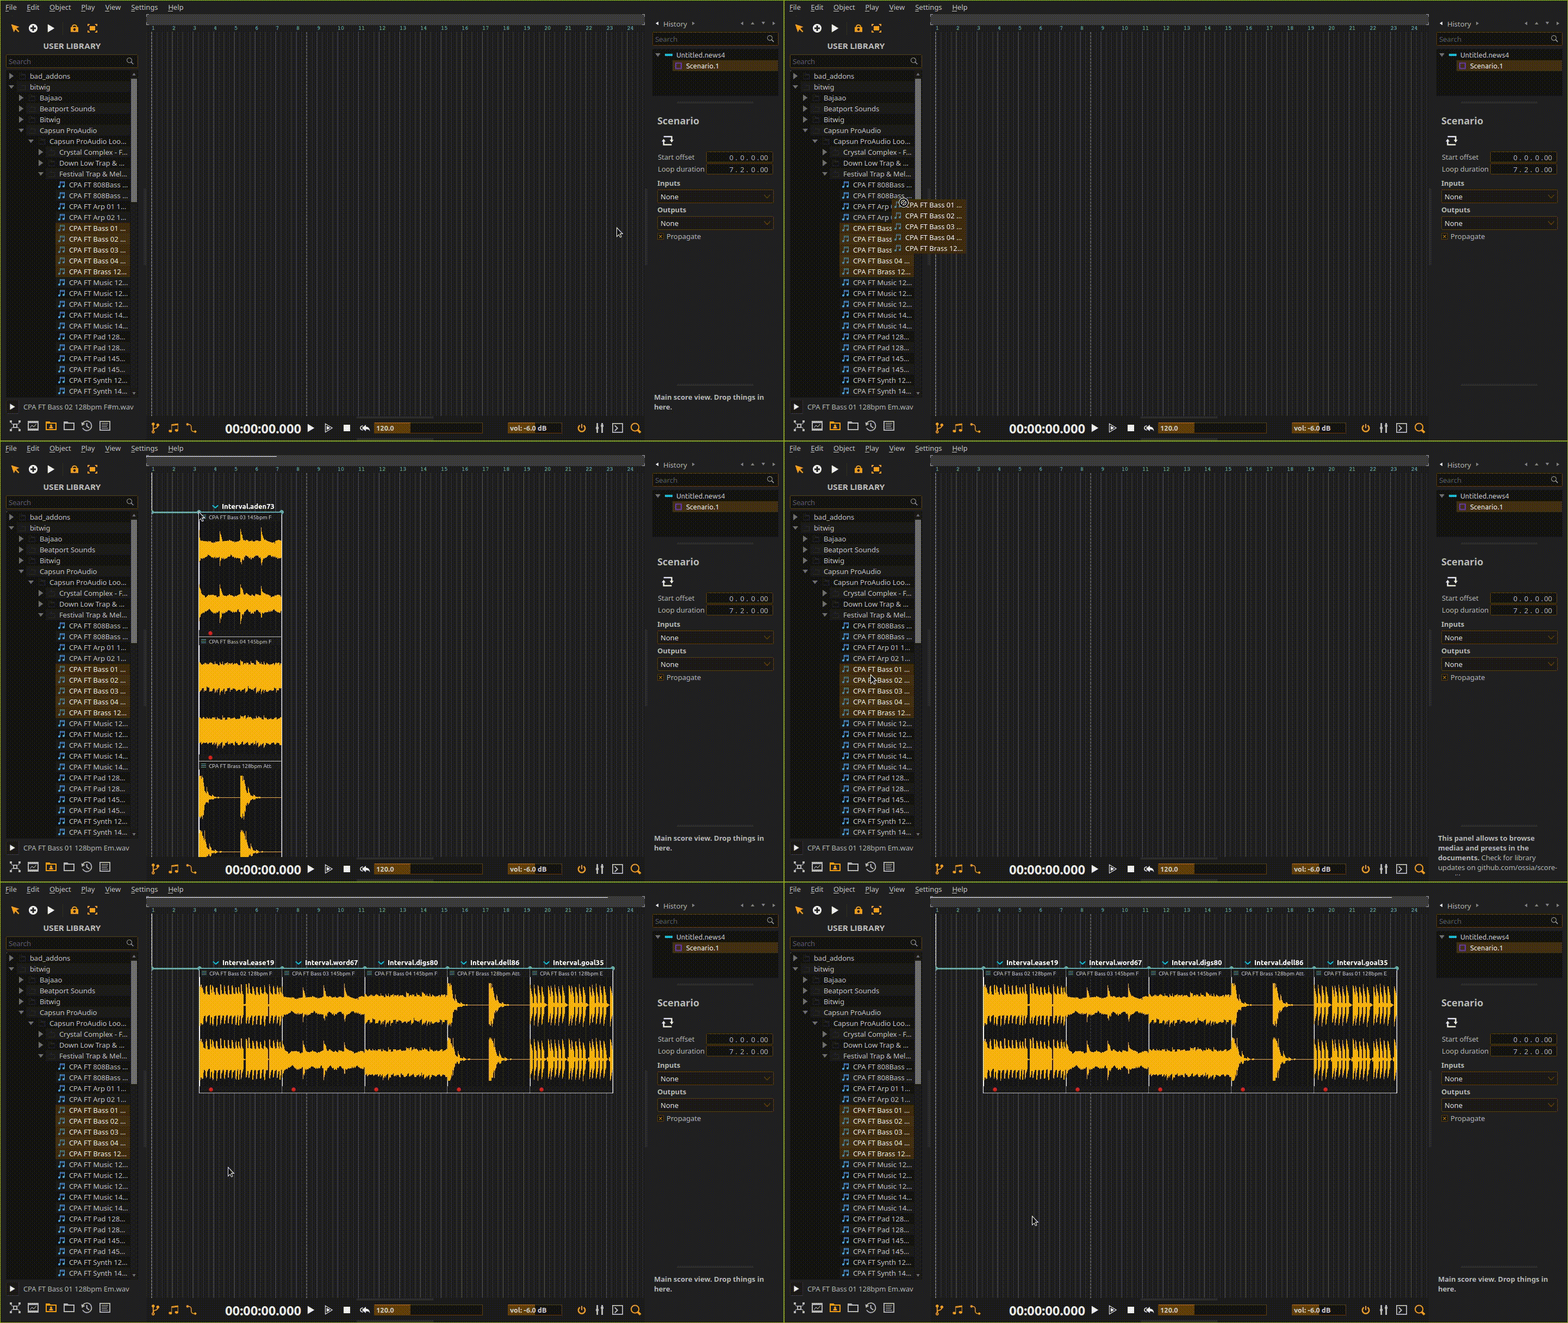
Audio, video and script files (Faust DSP, GLSL fragment shader, JS script…) can also be drag’n’dropped inside a scenario from your desktop’s file manager. By default, dropping several processes at the same time stacks them in the same interval. Holding the Maj key while dropping will create sequential intervals for each item in the selection.
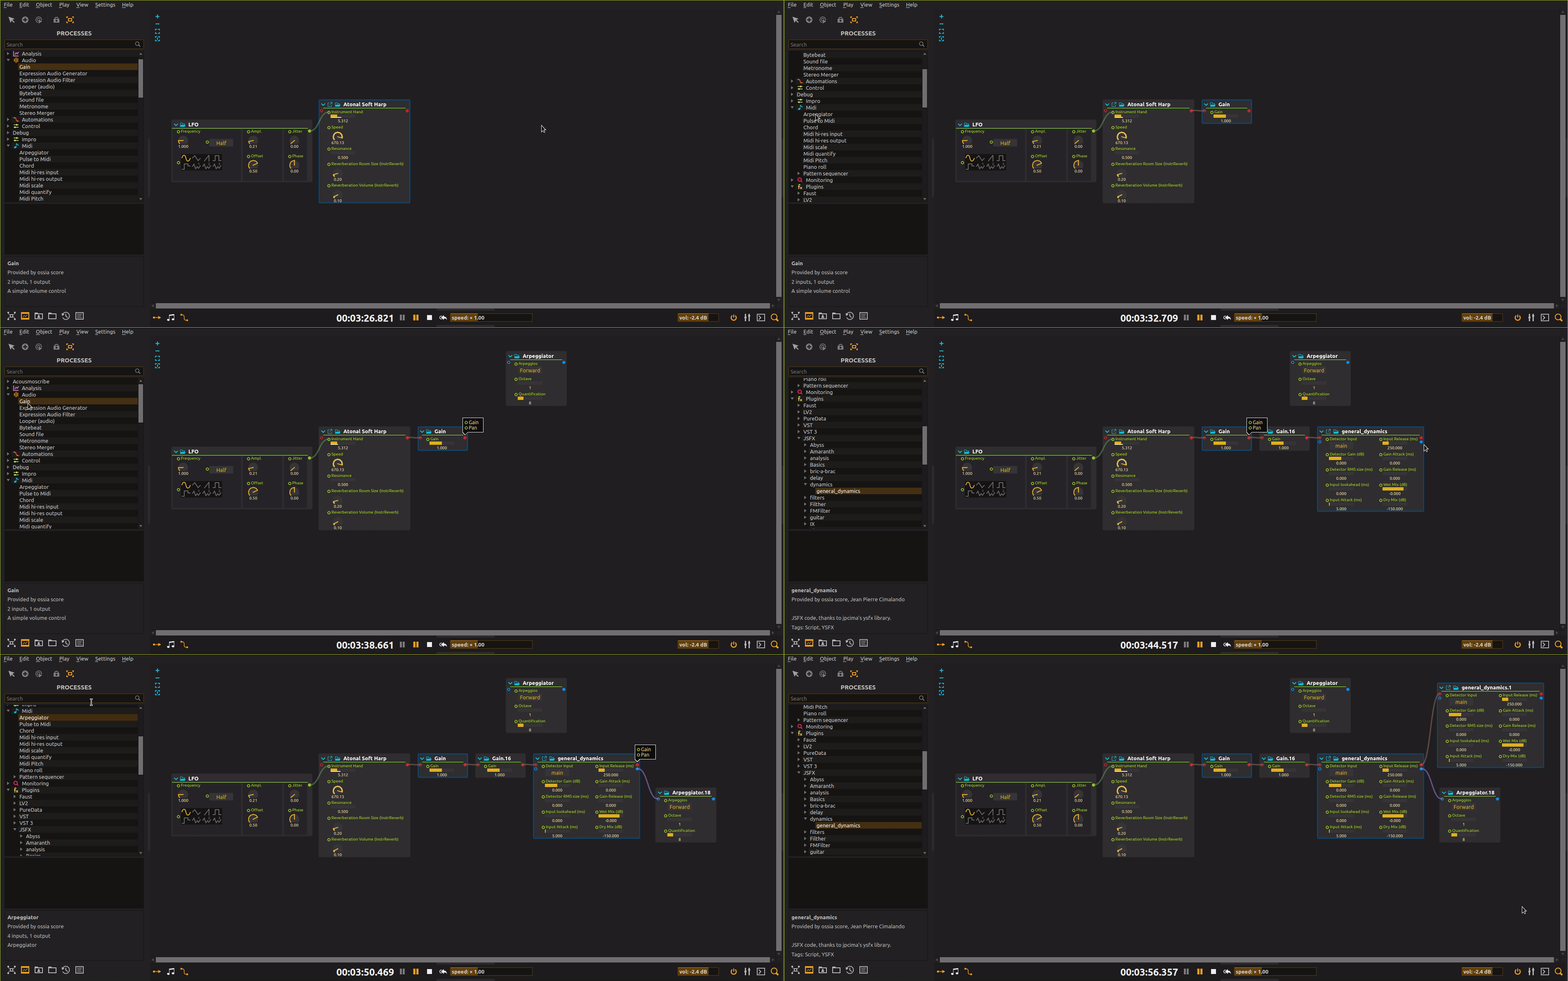
If a process is currently selected in the score, it is also possible to create a new process afterwards by double-clicking on it in the library. This will only work if the processes are compatible: the first output port of the selected process must be of the same type than the first input port of the process double-clicked in the library. A connection between the two ports will automatically be made. This allows to easily chain effects:
Likewise, if an output port is currently selected in the score, double-clicking on a process in the list will create and connect it afterwards if compatible.
Create processes on a state
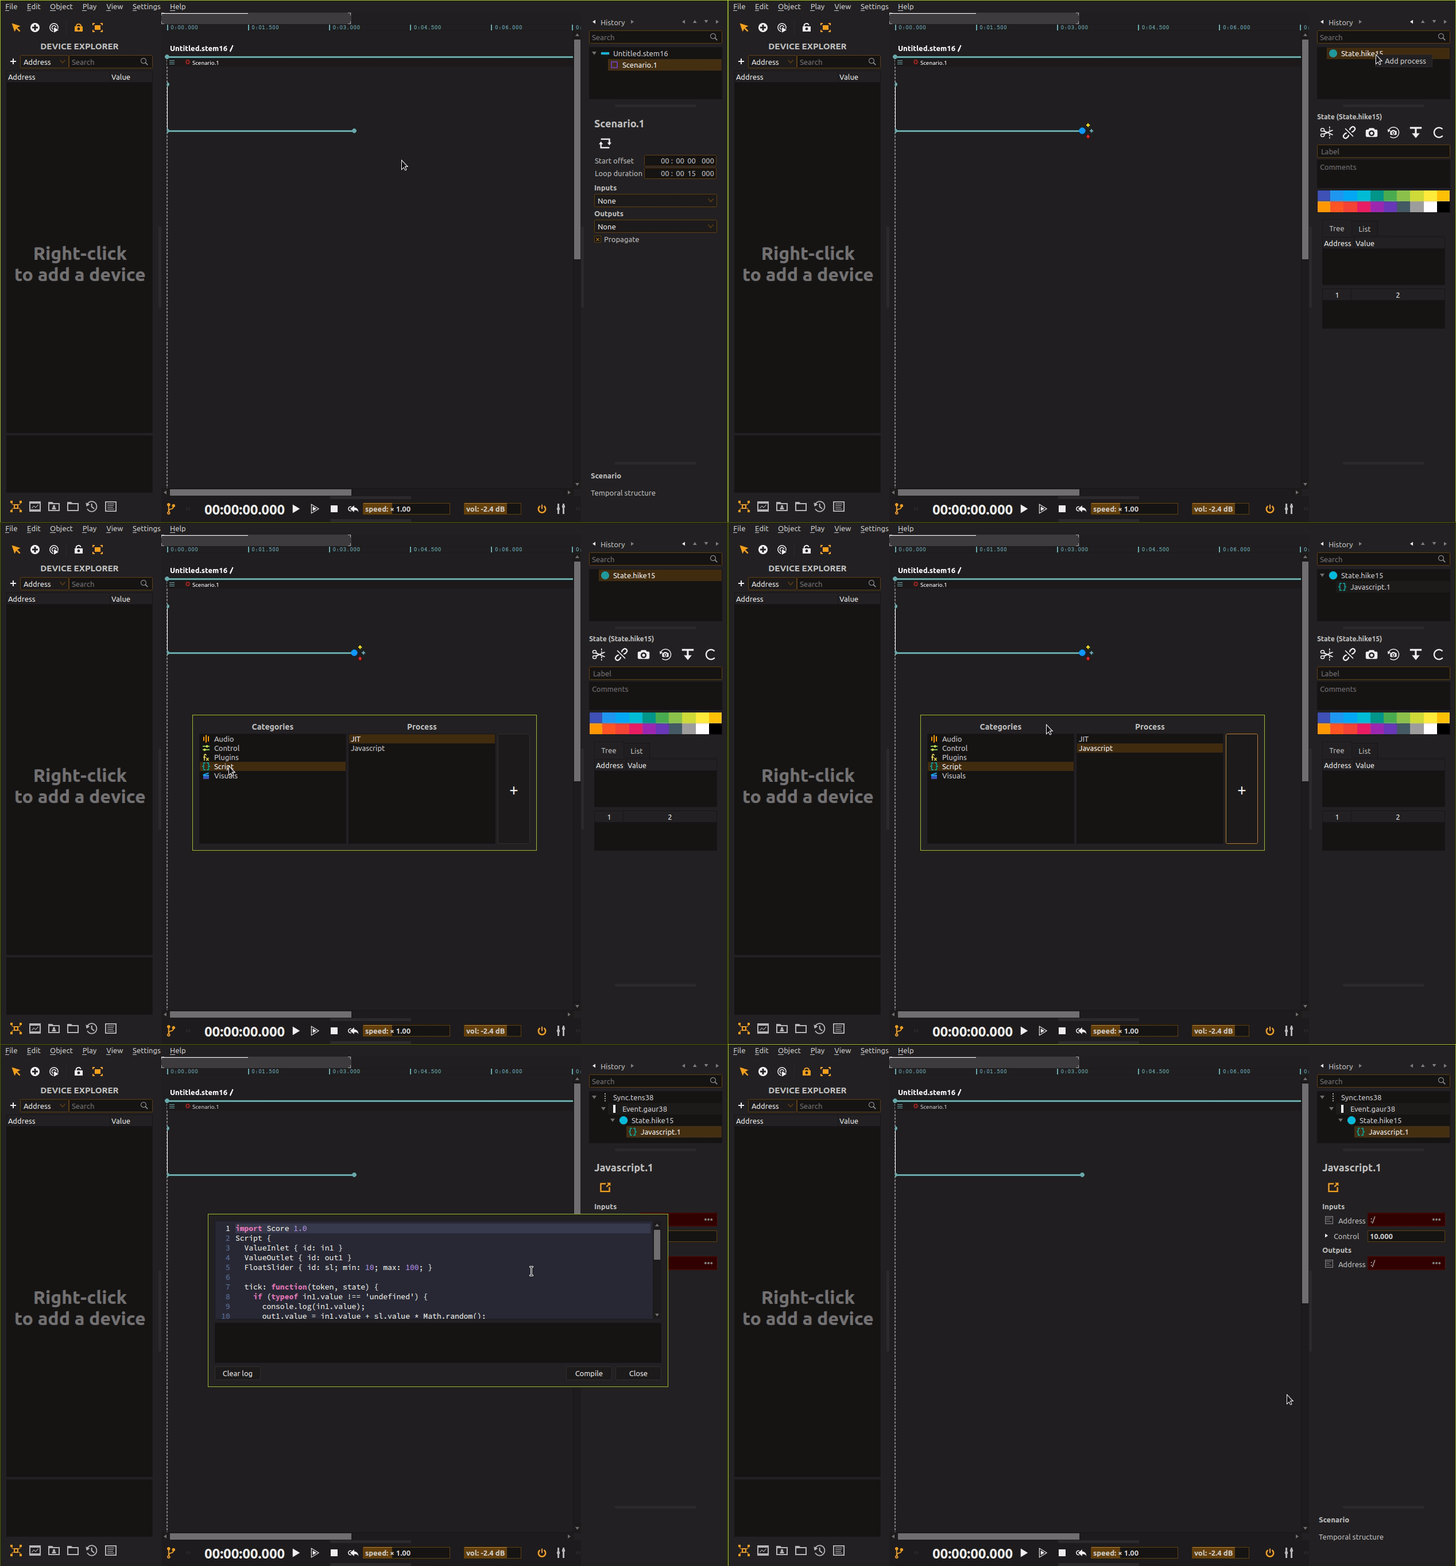
Adding processes on a state is a way to run a computation at a single, precise point in the timeline. The processes will not be directly visible in the timeline ; the state has to be selected to edit their properties through the inspector.
It is done by right-clicking on the state in the object inspector, and selecting the Add process option.
Remove existing processes
Using keyboard
To remove a process, select it (for example by clicking on the slot background) and choose Remove from the Object menu (Suppr/Backspace key).
Make sure the process you want to remove is properly selected when bringing it to front (for example, check the inspector) !
From Graph inspector
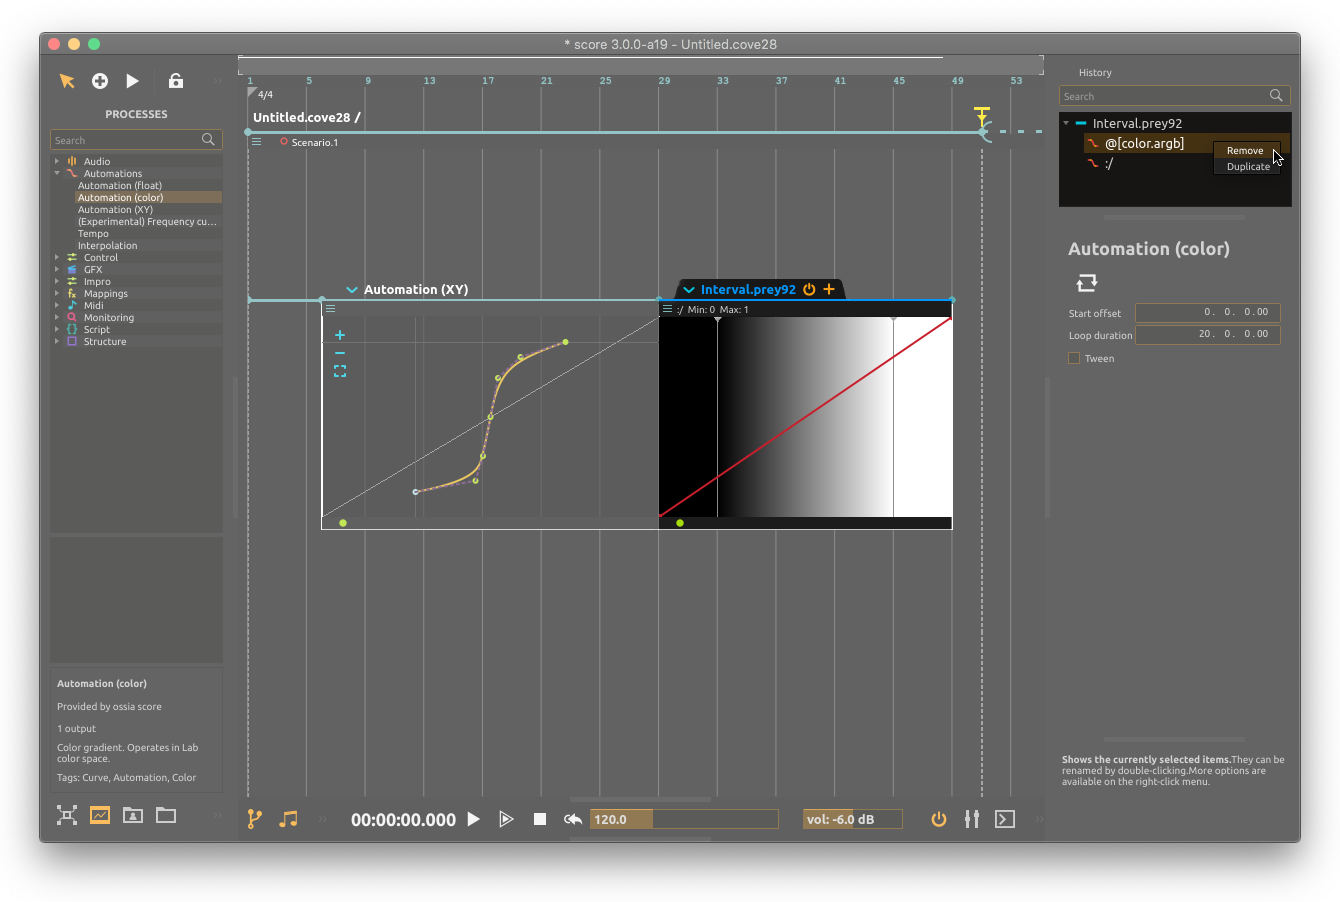
Processes can also be deleted from the Graph inspector at the top of score’s right panel. In the scenario, select the interval the process to remove is attached to. In the Graph inspector, browse through the attached processes and select the one to remove. Right-click to open the contextual menu and choose Remove (or use Suppr/Backspace key).
Edit processes
Fullsize edit
Processes can be edited in full size. This is especially handy when you want to precisely edit a process such as an automation or mapping function.
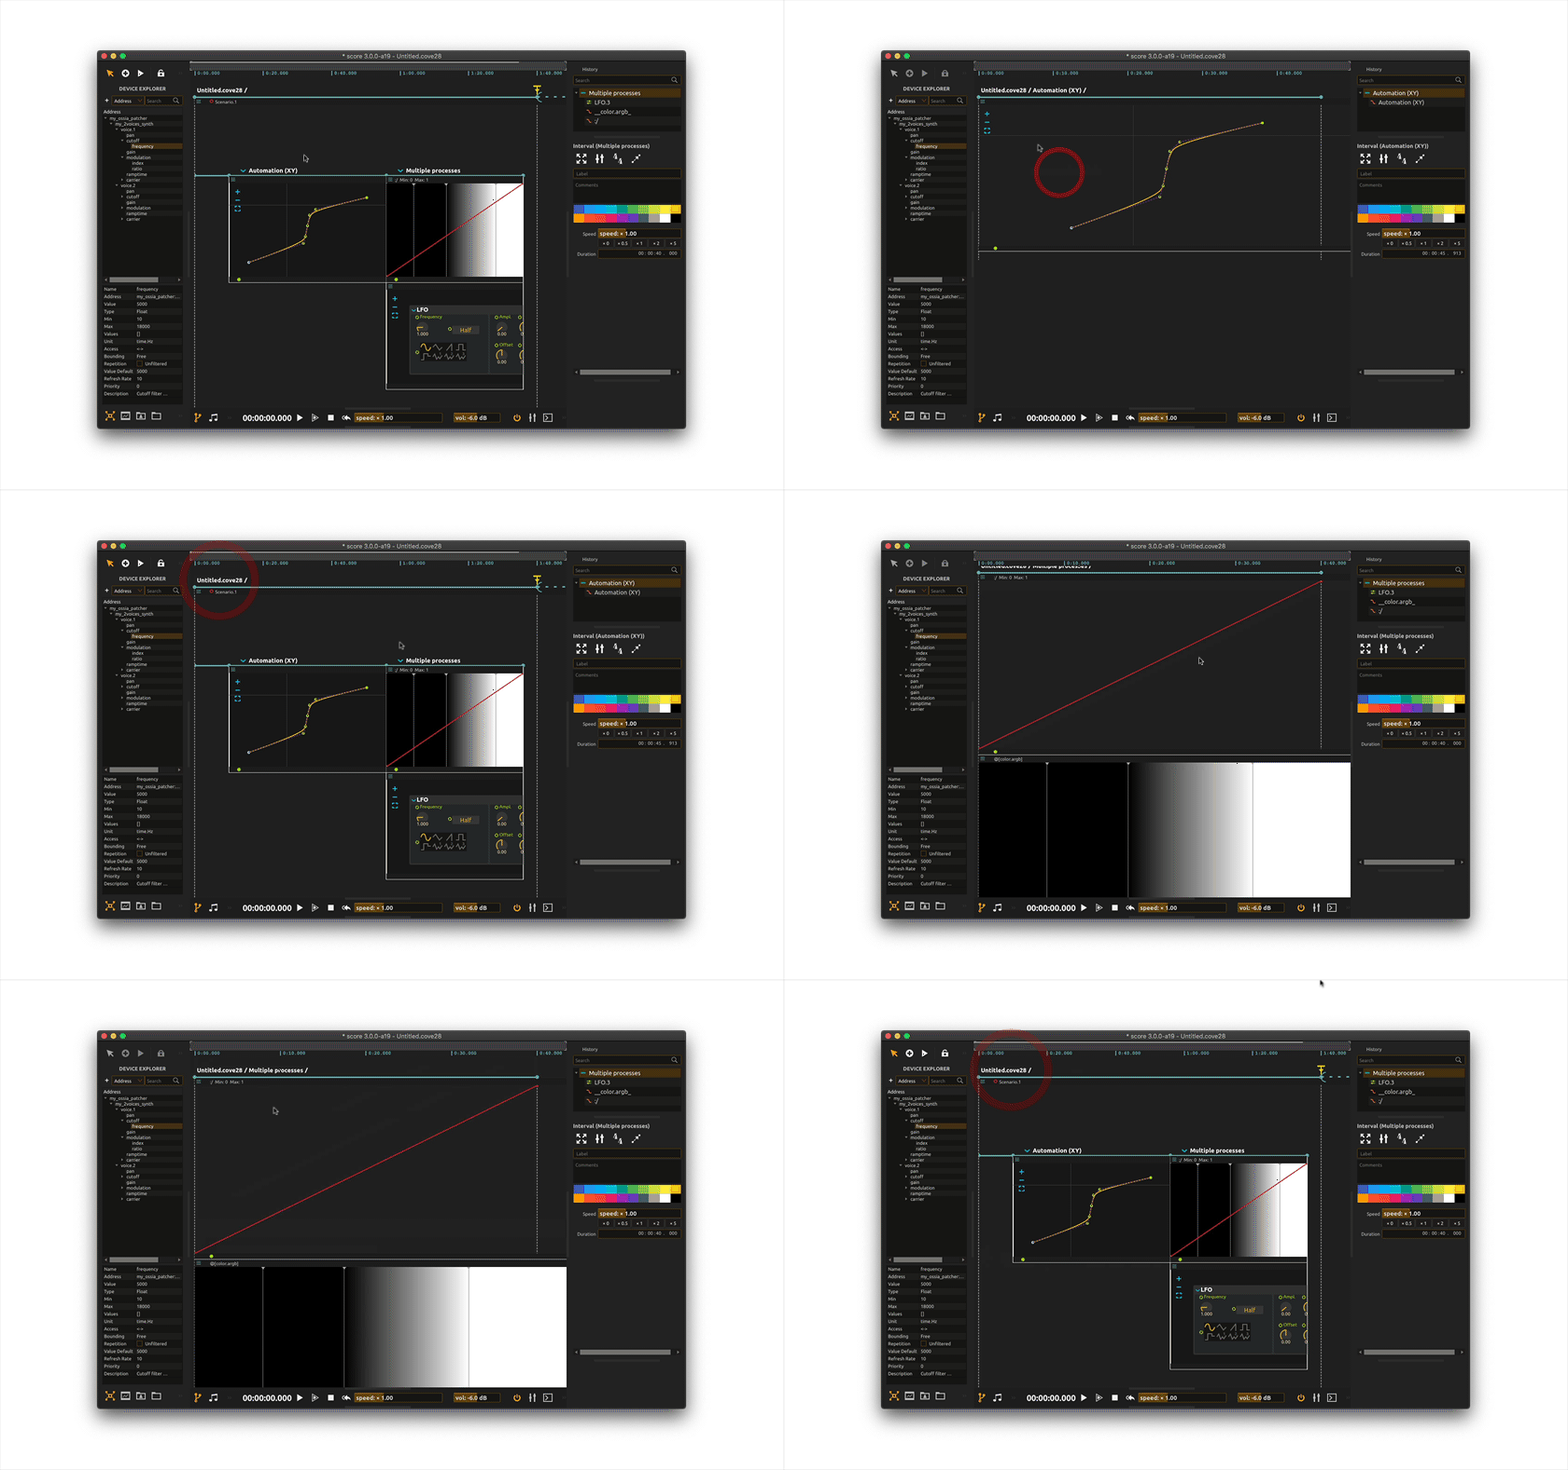
To display the process in full size, double-click on the interval the process is attached to. Process is now displayed using score central panel full width. Note that if several processes are attached to an interval, open them in full size will display all at once juxtaposed as shown below (see the Multiple processes interval).
To exit full size mode (go back to parent scenario), click the desired node of the path displayed at the top or use the Ctrl+Alt+↑(Win / Linux) or⌘+Alt+↑(Mac) shortcut.
Process Loops
Time-based processes such as automations, media and sub-scenarios can be looped for as long as their parent interval is active. When selecting a process, either from the object panel
or by clicking on process header, the loop option will appear in the Inspector.

Manage processes
Fold/unfold attached processes
Processes attached to an interval can easily be fold/unfold. This comes up especially usefull when working with a lot of processes while still maintaining some screen space and the scenario readable.
To do so, click the blue arrow on top of the processes to fold/unfold.
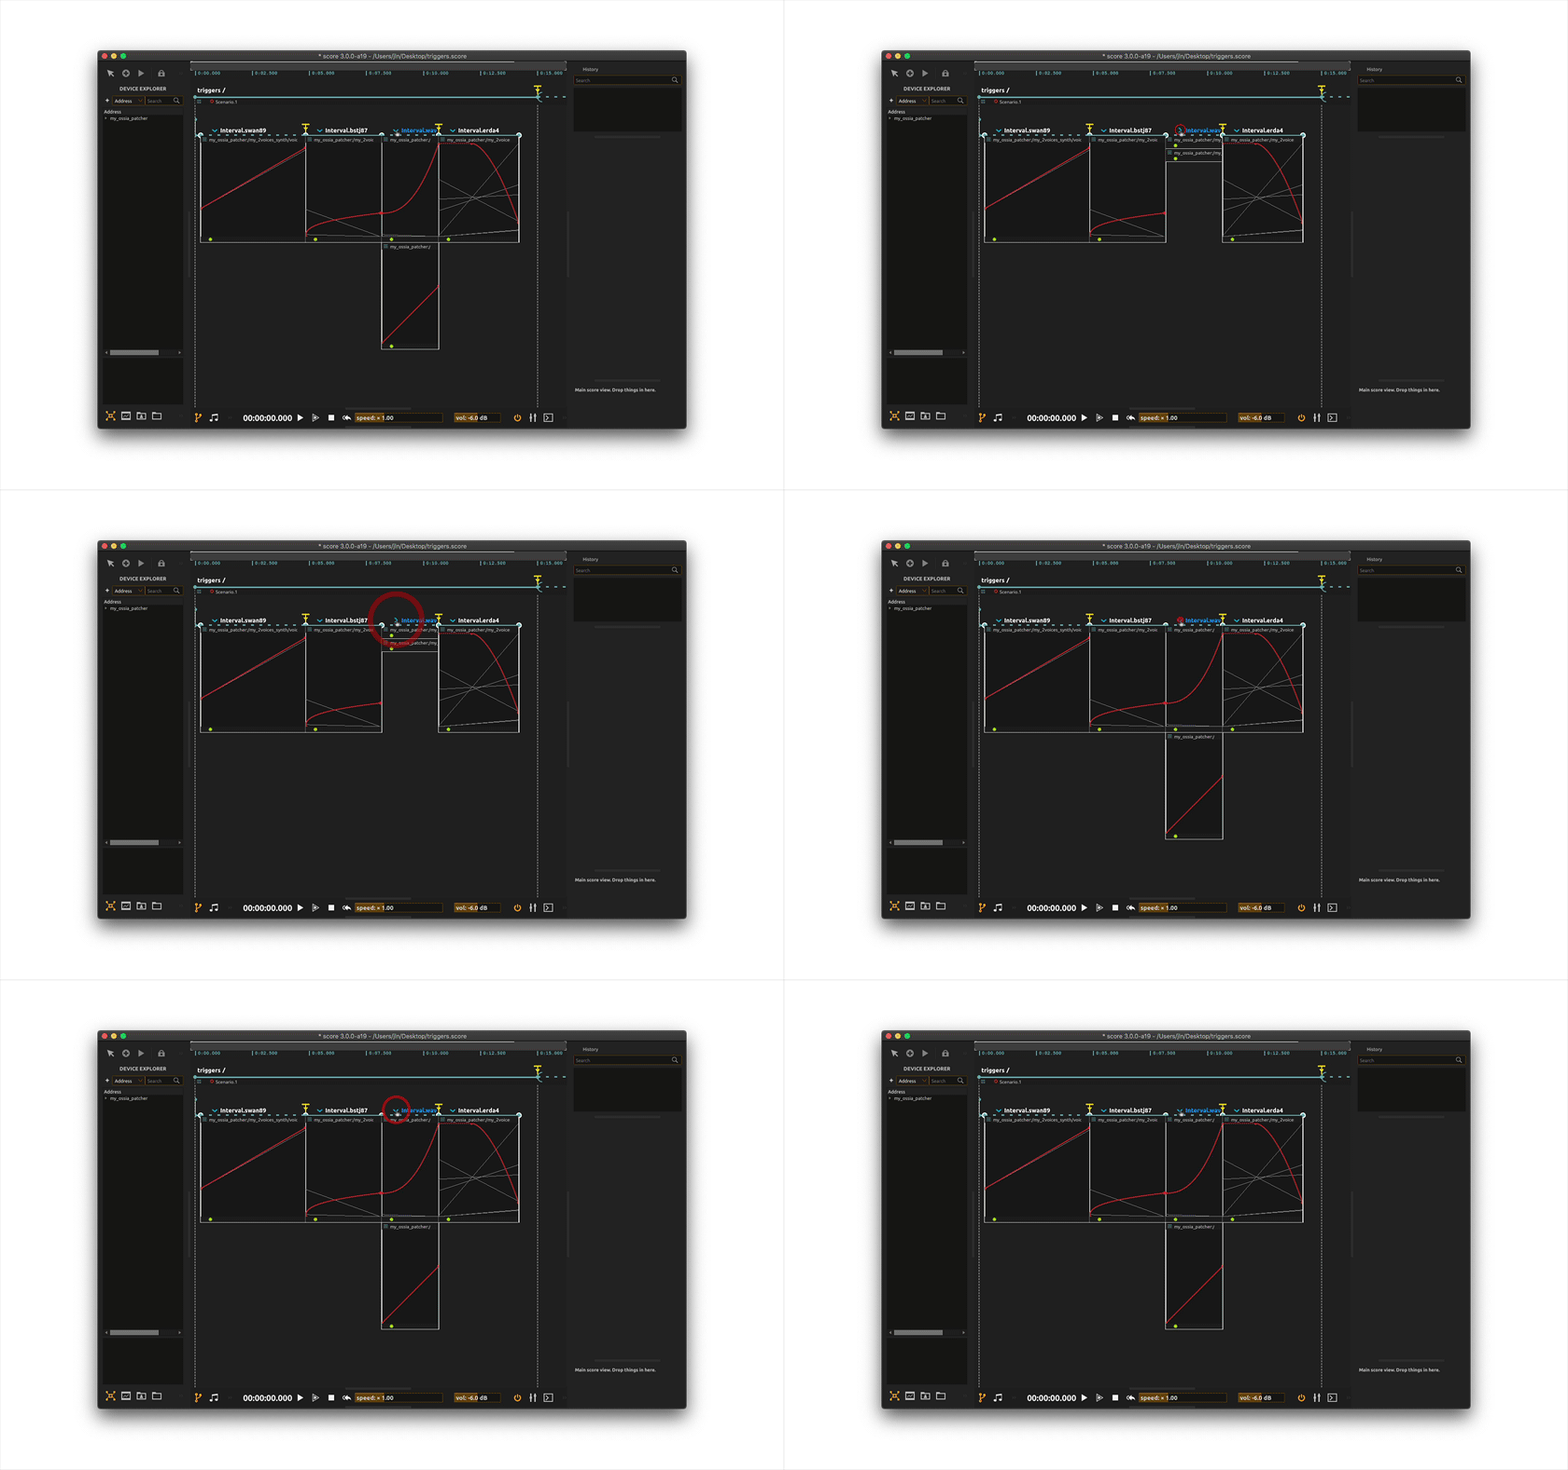
When selecting an interval, attached processes can also be fold/unfold using the Show processes & Hide processes entries from the Object menu.

Stacked slots
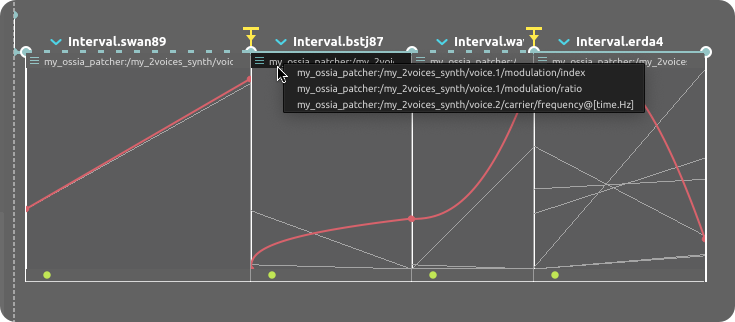
Time-based processes (that is, processes whose x represents time, such as automations, media files) can be stacked on a same slot. This is the default presentation when dragging some parameters onto an interval or dragging a process from library onto an interval. In that case, top-most process is displayed in full color while processes in other layers or displayed in semi transparent color. You can of course re-arrange them as you want.
Bring to front
To change which process to display top-most, mouse over to the top of the process slot displaying the destination address. Clicking the address bar opens up a contextual menu listing all layered processes. Selecting one in the menu brings it to front.
Move to new slot
Processes can also be juxtaposed in several slots rather than stacked on top of the other. Grab the handle at the top left corner of the slot and drag & drop it on another slot to move it above another process or between different slots to insert it.
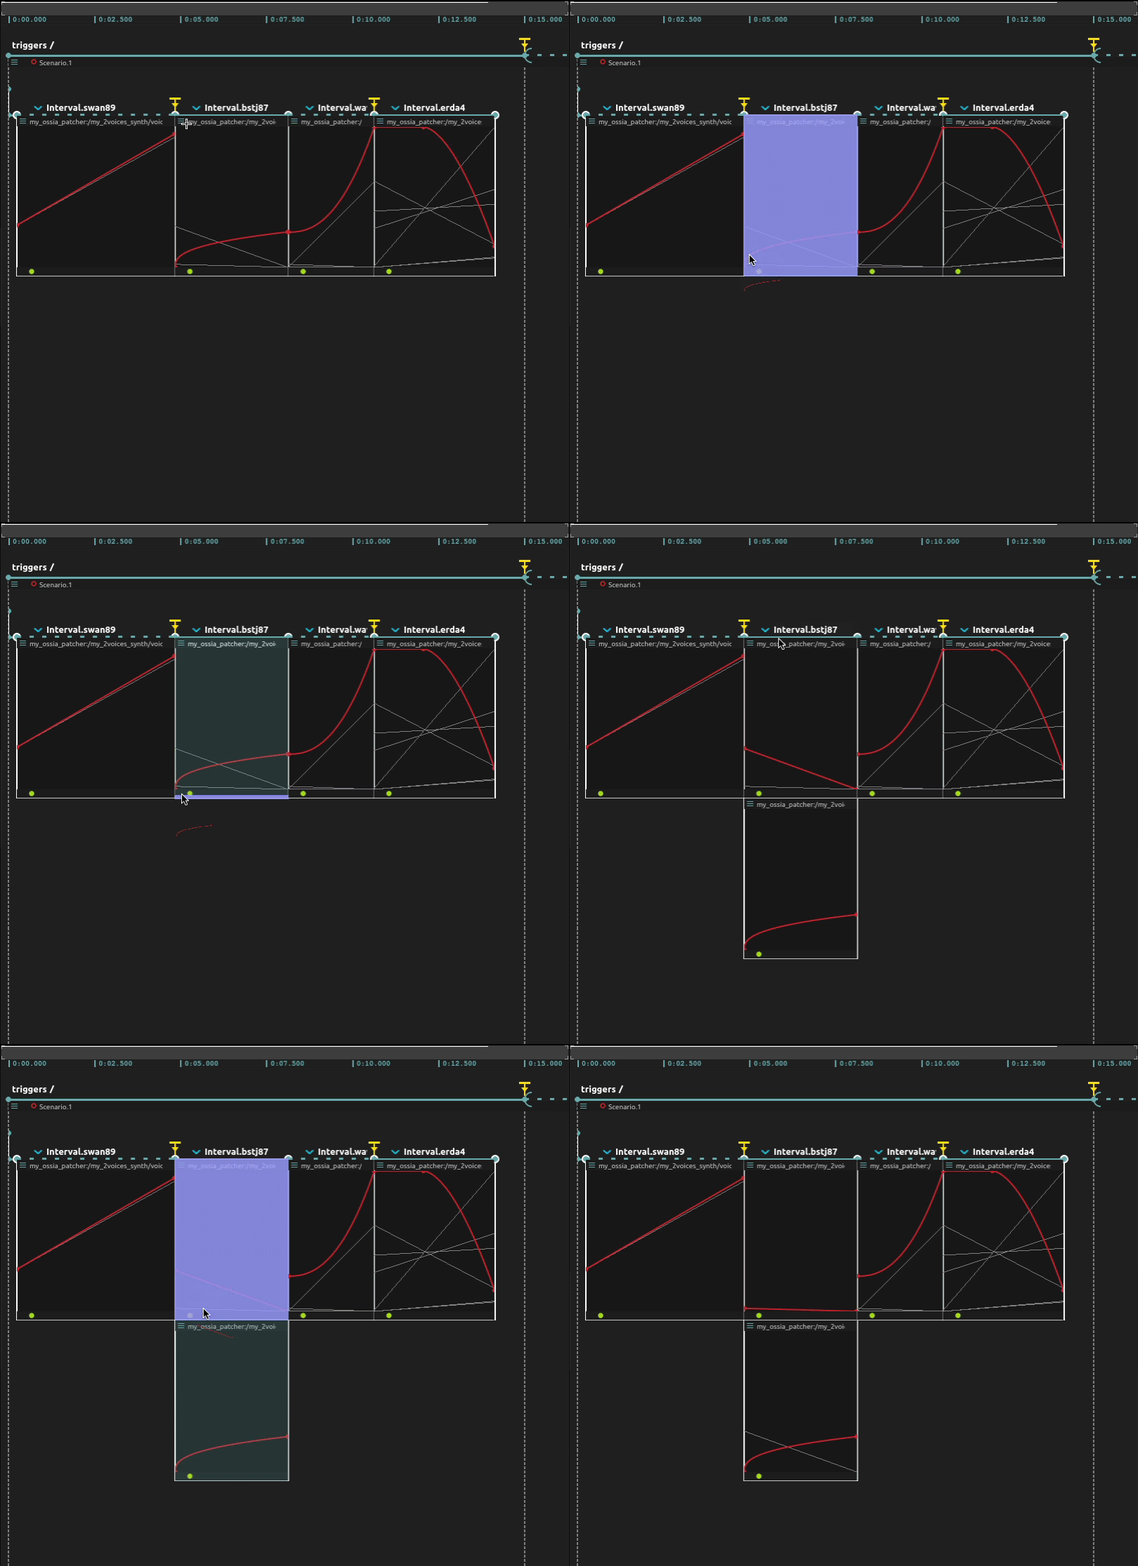
Processes can also be dragged & attached to a new interval
Table of contents
- 2D Spline
- ADSR
- AI Prompt Composer
- AI Prompt Interpolator
- AI Recognition
- Analysis
- Array utilities
- Audio Effects
- Audio Particles
- Audio looper
- Audio plugins
- Audio utilities
- Automation (float)
- BarrVerb
- Bytebeat
- C++ JIT
- CSV recorder
- Calibrator
- Classifier
- Compute Shaders
- Computer Vision utilities
- Context-Free Art
- Control surface
- Control utilities
- DBAP
- Display Utilities
- Easetanbul
- Envelope Follower
- Faust
- GBAP
- Geo Zones
- Gestures
- Gradient
- Gradient Scrubber
- Graphics Utilities
- HDF5 Support
- ISF Shaders
- Image process
- Interpolator
- Javascript
- LED View
- LFO
- MIDI File Reader
- MIDI File Scaler
- MIDI File Scroller
- MIDI Filter
- MIDI utilities
- Mapping (float)
- Mapping Curve
- Mapping tool
- Mapping utilities
- Math expressions
- Matrix
- Matrix Spatialization
- Melodial
- Model display
- Multi-Cursor Manager
- Nodes
- Object filter
- Object loader
- Path Generator
- Pattern Applier
- Pattern Combiner
- Patternal
- Patternist
- Piano roll
- Pixel Utilities
- Point2D View
- Poles
- Process Launcher
- Pure Data integration
- Qwen LLM
- Range filter
- Rate Limiter
- Regressor
- Scenario
- Shell command
- Signal Display
- Smooth
- Soundfiles
- Spammer
- Sprite Reader
- Step sequencer
- Structure Synth
- Sweeper
- Teleplot
- Tempo
- Text process
- Texture generator
- Trigger
- Tweener
- Value Display
- Value Filter
- Vertex Shader Art
- Video
- Wavecycle