Saving and recailling your device’s state
ossia score provides a number of tools to author precise control of the various devices involved in your project. Here we will focus on two basic elements:
- saving some devices’ state (aka making snapshots) to be recalled during the execution of your scenario
- writing automations for some parameters
These illustrate a small part of the possibilities detailed later in the manual, but should get you started with score basic workflow.
Storing your current device state
Saving your device current state on the timeline is as easy as dragging parameters you want to save from the Device explorer to where you will want them to be recalled in the timeline.
You can store at one place all parameters of a device or only part of, as well as parameters from different devices.
Note that when selecting a node in the namespace, all parameters below get selected. You may also select a single or many parameters using standard key combinations:
- Shift+click: Select all parameters between clicked parameter and previously selected one
- Ctrl+click(Win / Linux) or⌘+click(Mac): Add selected parameter to the current selection
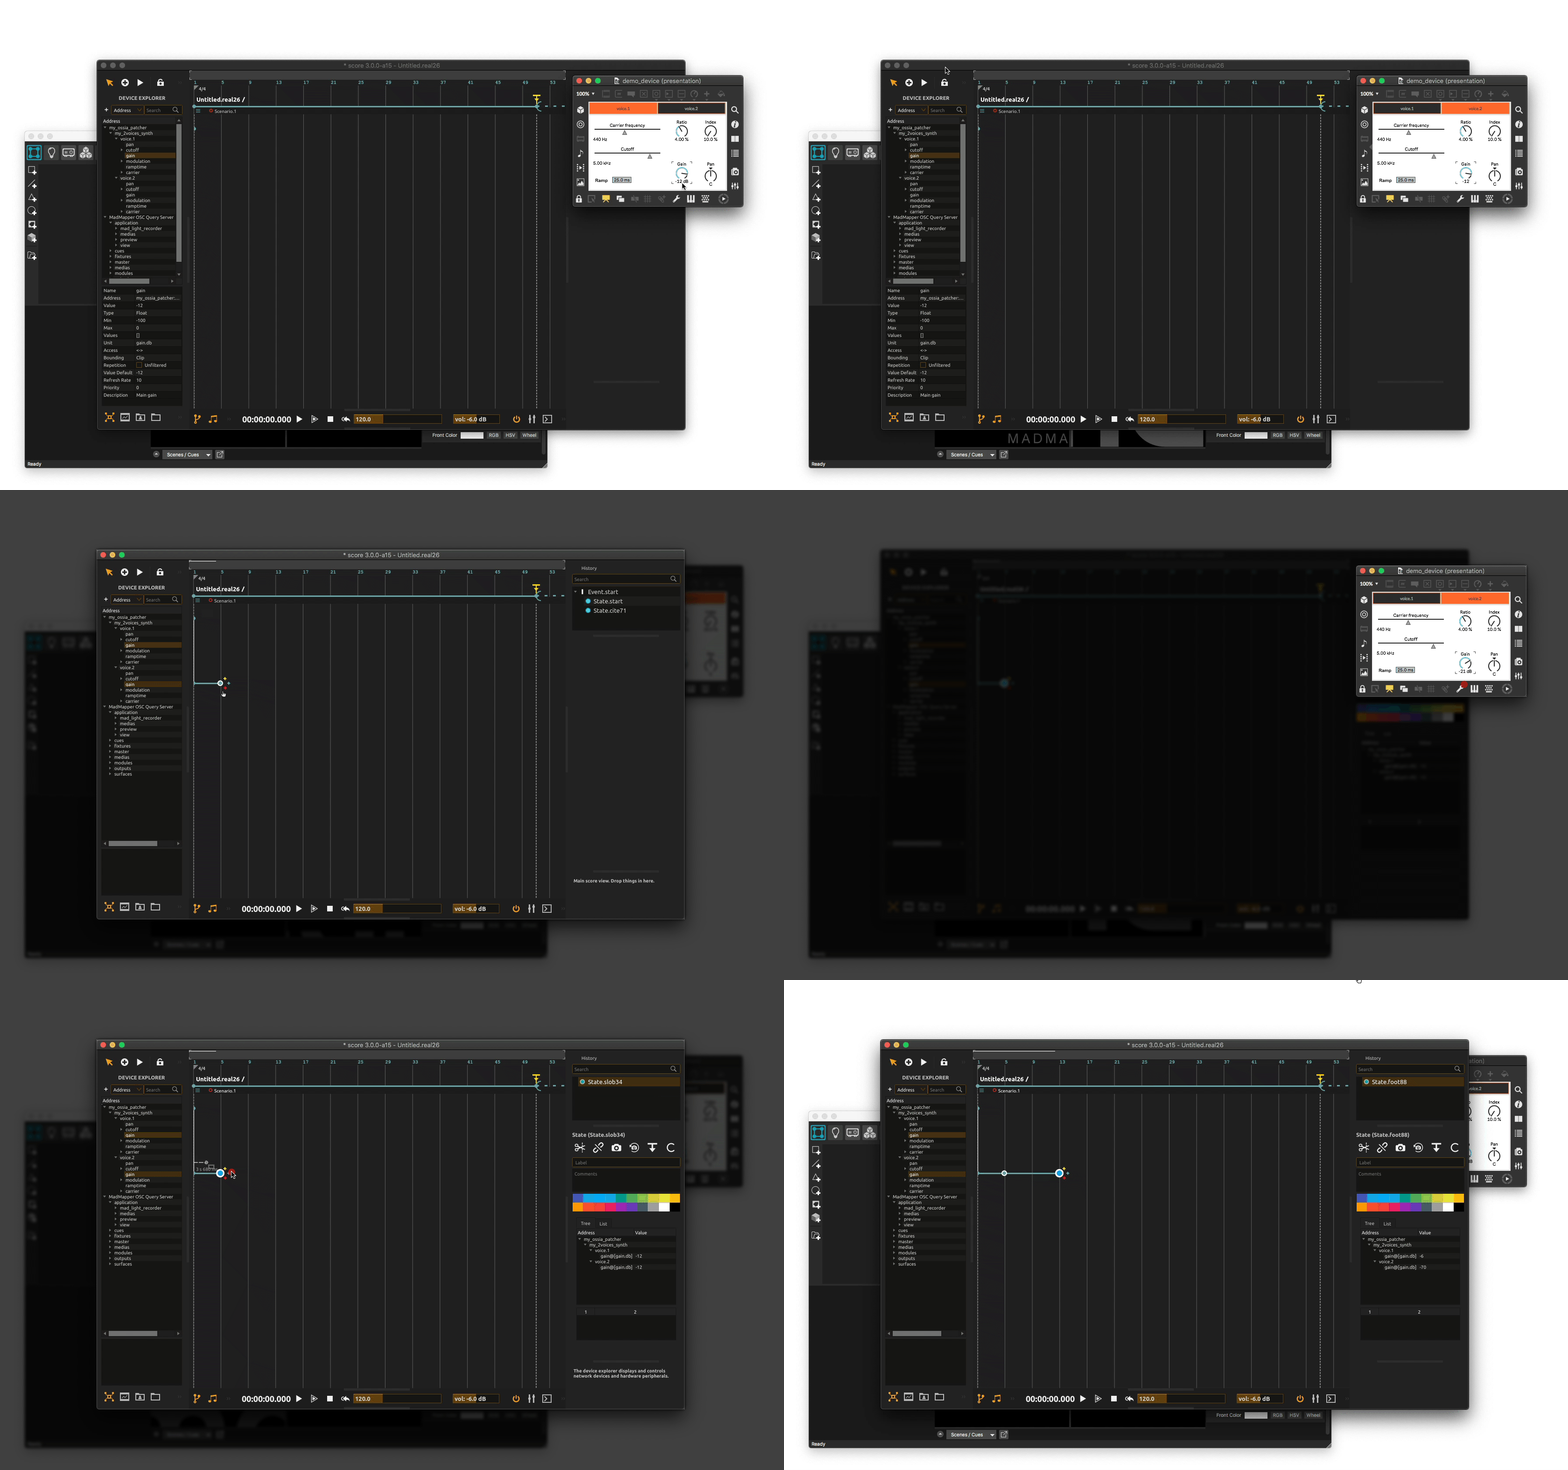
In the illustration below, we will select just the gain parameters from our ossia compatible Max synth patch and store their current value at the 5th bar of our scenario. As you drop these gain parameters on the timeline, you can see a blue disc circled in white gets created. Clicking this state icon, you can see in the inspector panel both parameters and their value listed as a tree-like view.

If you start playing your scenario using the play button from the transport (space key), this state will get recalled and sent to your device as the play-head crosses its position on the timeline. Should you need this state to be recalled earlier or later, just stop execution of the scenario (using stop button from the transport bar or ↵ key), then select and drag it along the timeline.
If your device does not echo back its parameters changes to score, you can still grab the parameters to store from the
Device explorerand drop them on the Timeline. Then from the state inspector panel, type the desired value next to each parameter. You may as well type the desired values in theDevice explorerfirst, then drag & drop the parameters on the timeline.
You may now make some changes to your device, then store this new state using the same drag & drop workflow.
Note that when storing our device’s second state in the timeline, score proposes to bind this snapshot to different elements in the timeline, as displayed with a dashed gray line. For now, we will just make sure this snapshot is bound to the first one we placed on the timeline. But be sure to check dedicated section in the manual to see the features score provides to help you structure elements in your scenario.
You can now start sequencing your devices’ states in your scenario or read detailed information about managing states and automations.