OSC device
Setting up communication with OSC device
Once opened a new score project, right-click in the Device explorer on the left of score window and choose Add device from the Device explorer contextual menu. This brings score’s device setup window.
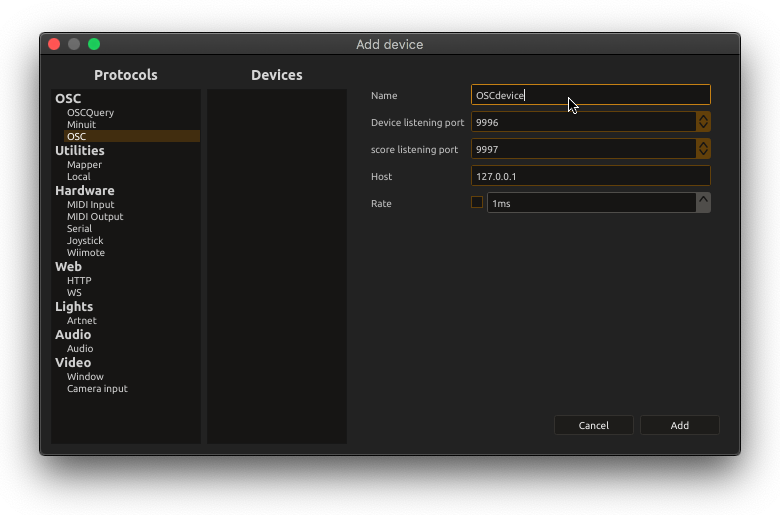
From the Protocols column, choose OSC and setup IP address your device is running on as well in & out ports. You may also specify a name for your device. For the demo purpose here, we will use the default OSCdevice name. When done, the Device explorer pane should display our device top node.

Note: Should you need to change settings of your OSC device, the setup panel can be brought back by choosing Edit in the device contextual menu.
We can then setup our device’s OSC addresses we want to automate within score.
Setting up OSC addresses
Using OSC learn
In the Device explorer pane, choose Learn in our device contextual menu. This opens up score’s OSC learning window. score will now monitor any OSC incoming value.
For demo purpose here, we will use Vidvox’s handy OSC Test application. As soon as we send values to score from our OSC Test application, addresses get learned and displayed in the OSC learning window.
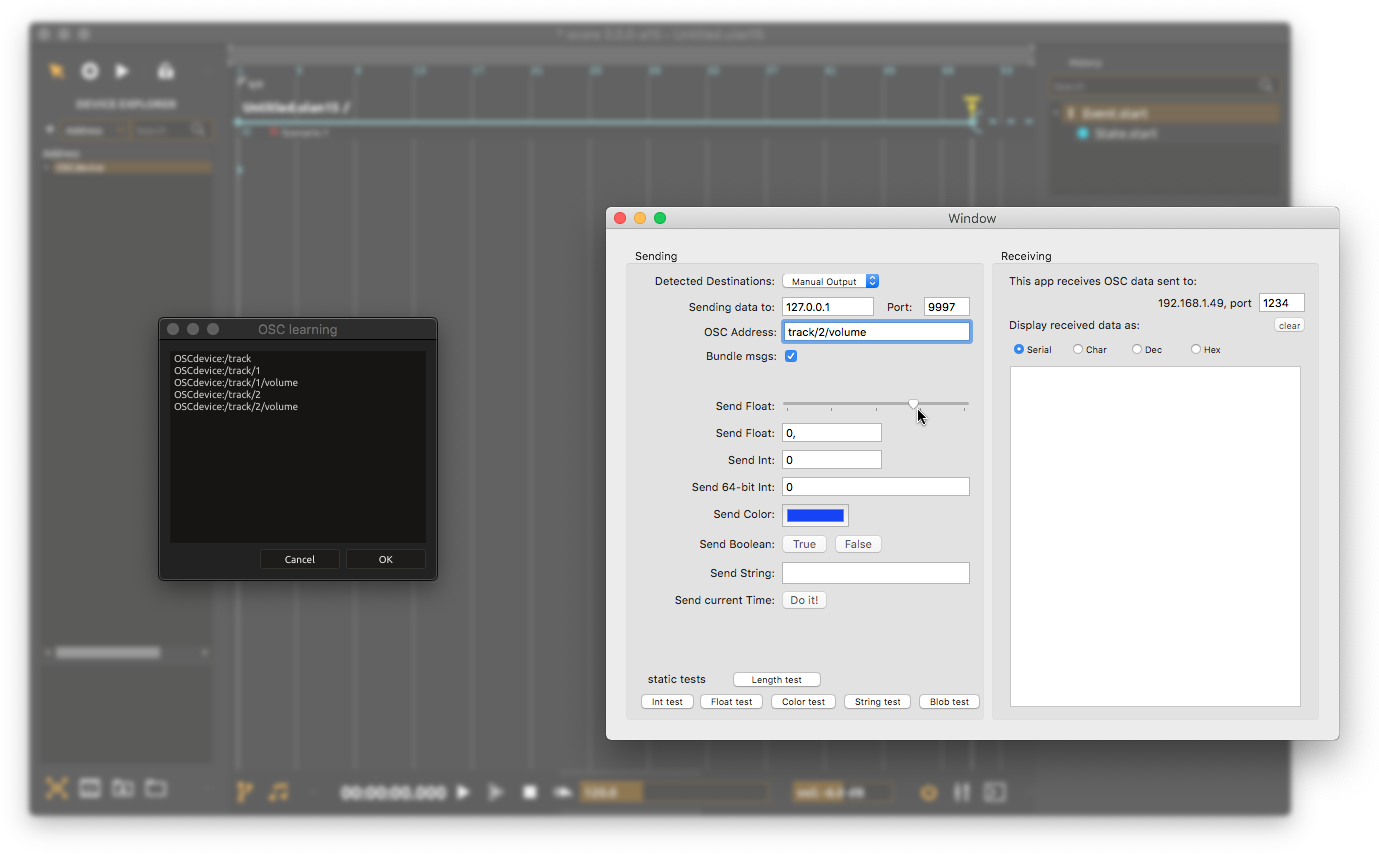
When done, the Device explorer pane should display all learned OSC addresses. You can browse your device namespace, fold/unfold any node in the namespace hierarchy by clicking the arrow prepending each node. You can also see a parameter current value in your OSC device by selecting this parameter in score Device explorer and check its bottom section.
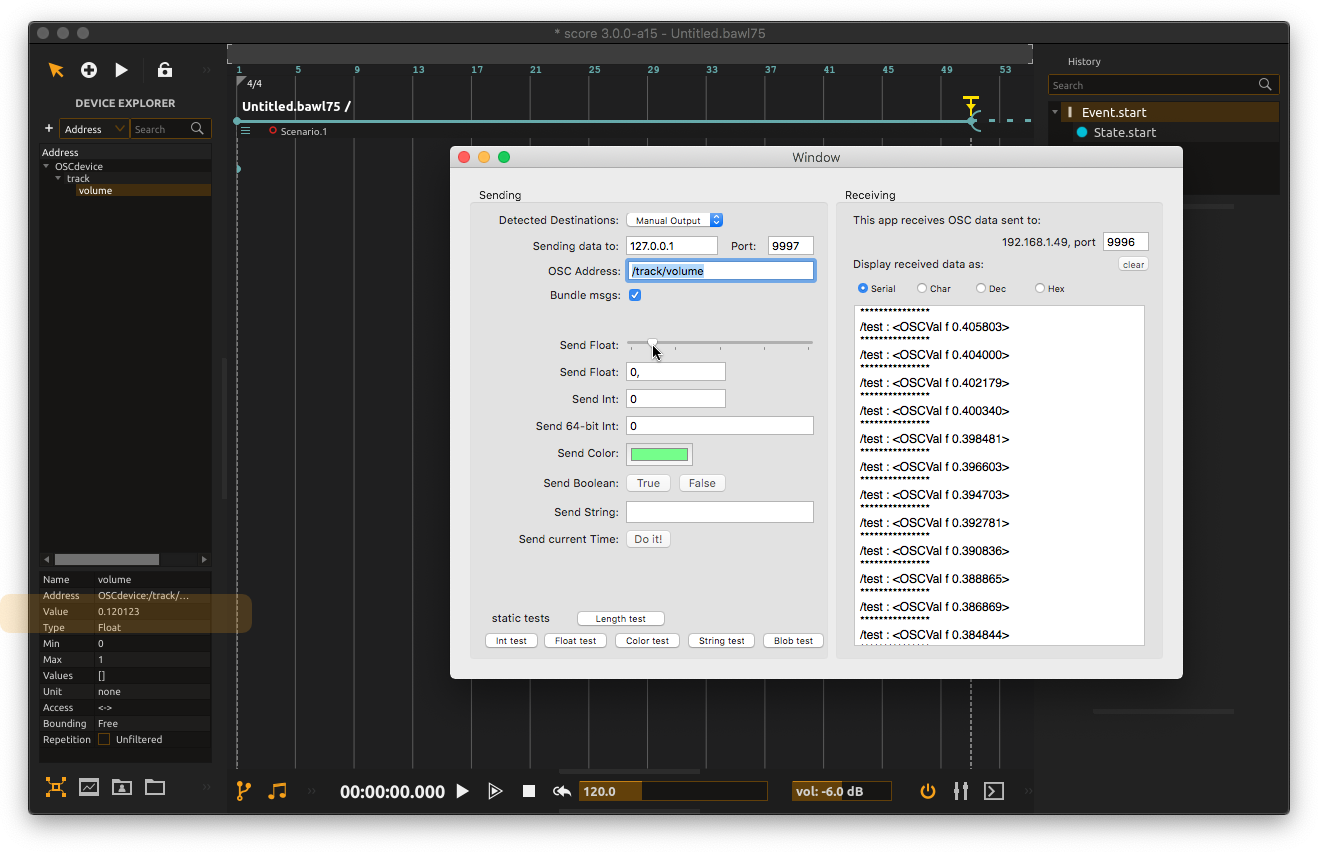
Adding addresses manually
Should you need to setup your score project without having your OSC device opened, addresses can be added in the device explorer manually.
Once having created an OSC device as explained above, choose Add child in the device contextual menu.
As of score 3.0.0, each level of your parameter’s OSC address is to be declared separately. Assuming we want to add the address OSCdevice/track/1/volume, we first need to create the ‘track’ node. From the OSC editor window, type track in the Name text field and leave default type container (that is: a node in the namespace above other nodes or parameters). Then from the freshly created track node contextual menu, choose Add child to create a 1 node, then from this node, choose Add child again to create our volume parameter.
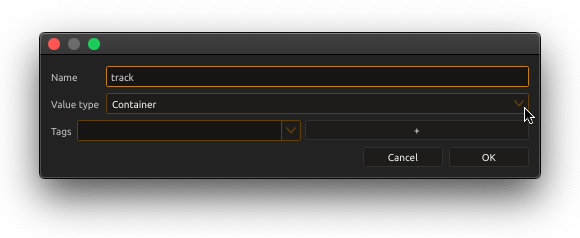
For our volume parameter, we want to set the type as something else than container. For example, we will set up our parameter as a float value.
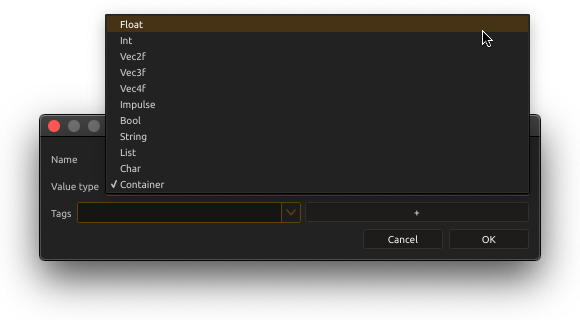
You may also edits some of the parameter’s attributes as detailed in next step.
Setting up parameters’ attributes
Once declared either using learn function or manually, parameter’s general behaviour can be further defined by setting up its various attributes.
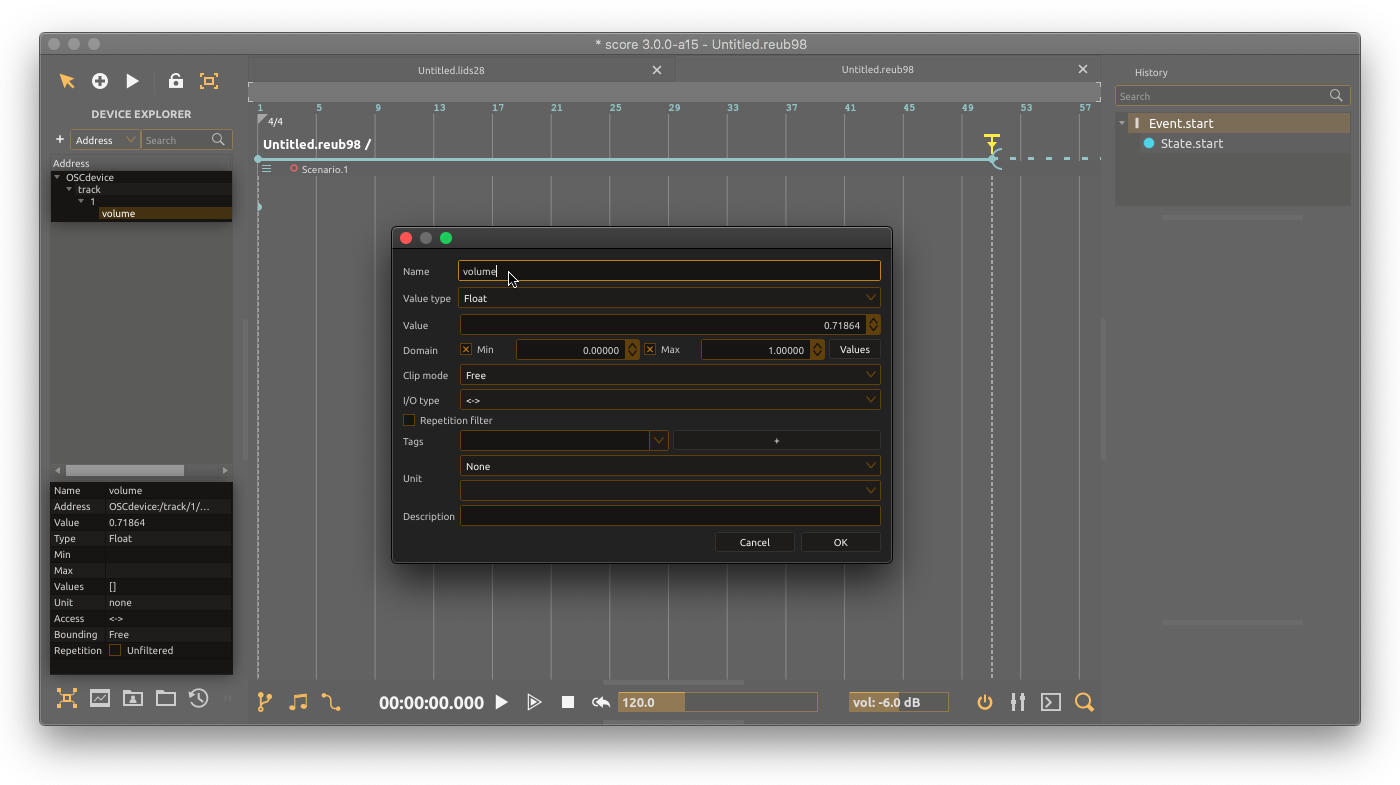
When selecting a parameter in the Device explorer pane, its attributes can be displayed and edited in the bottom section of the pane. A dedicated window can also be opened by choose Edit in the parameter contextual menu.
For each value type, a number of attributes can be defined, such as: value domain (min. and max. value), clip mode (parameter handling of value exceeding its domain), repetition filter, etc.
Saving OSC device for later use
When properly set up, your OSC device namespace can be exported and saved to disk for latter use. To do so, choose Export device in the device contextual menu.