Breaking the timeline
In previous steps of this Quick Start guide, we used score to write simple scenario use cases following a timeline-based approach pretty similar to the one found in usual DAW software. While such an approach allows us to write very precise temporal developments of a scenario, it may also hit some limits in live performance situation or installation where a much more flexible approach is required. score offers a number of features to bridge the gap between different approaches and thus combine timeline-based workflow and cue-based workflow. One of them is the use of trigger points.
Enabling triggers
Introducing trigger points in your scenario allows us to keep organizing things in time while allowing interactive triggering of elements: when executing the scenario, parts of the scenario starting with a trigger point will be put “on hold” until they get triggered. When triggered, following automations and states will get executed at the speed and duration specified in the scenario.
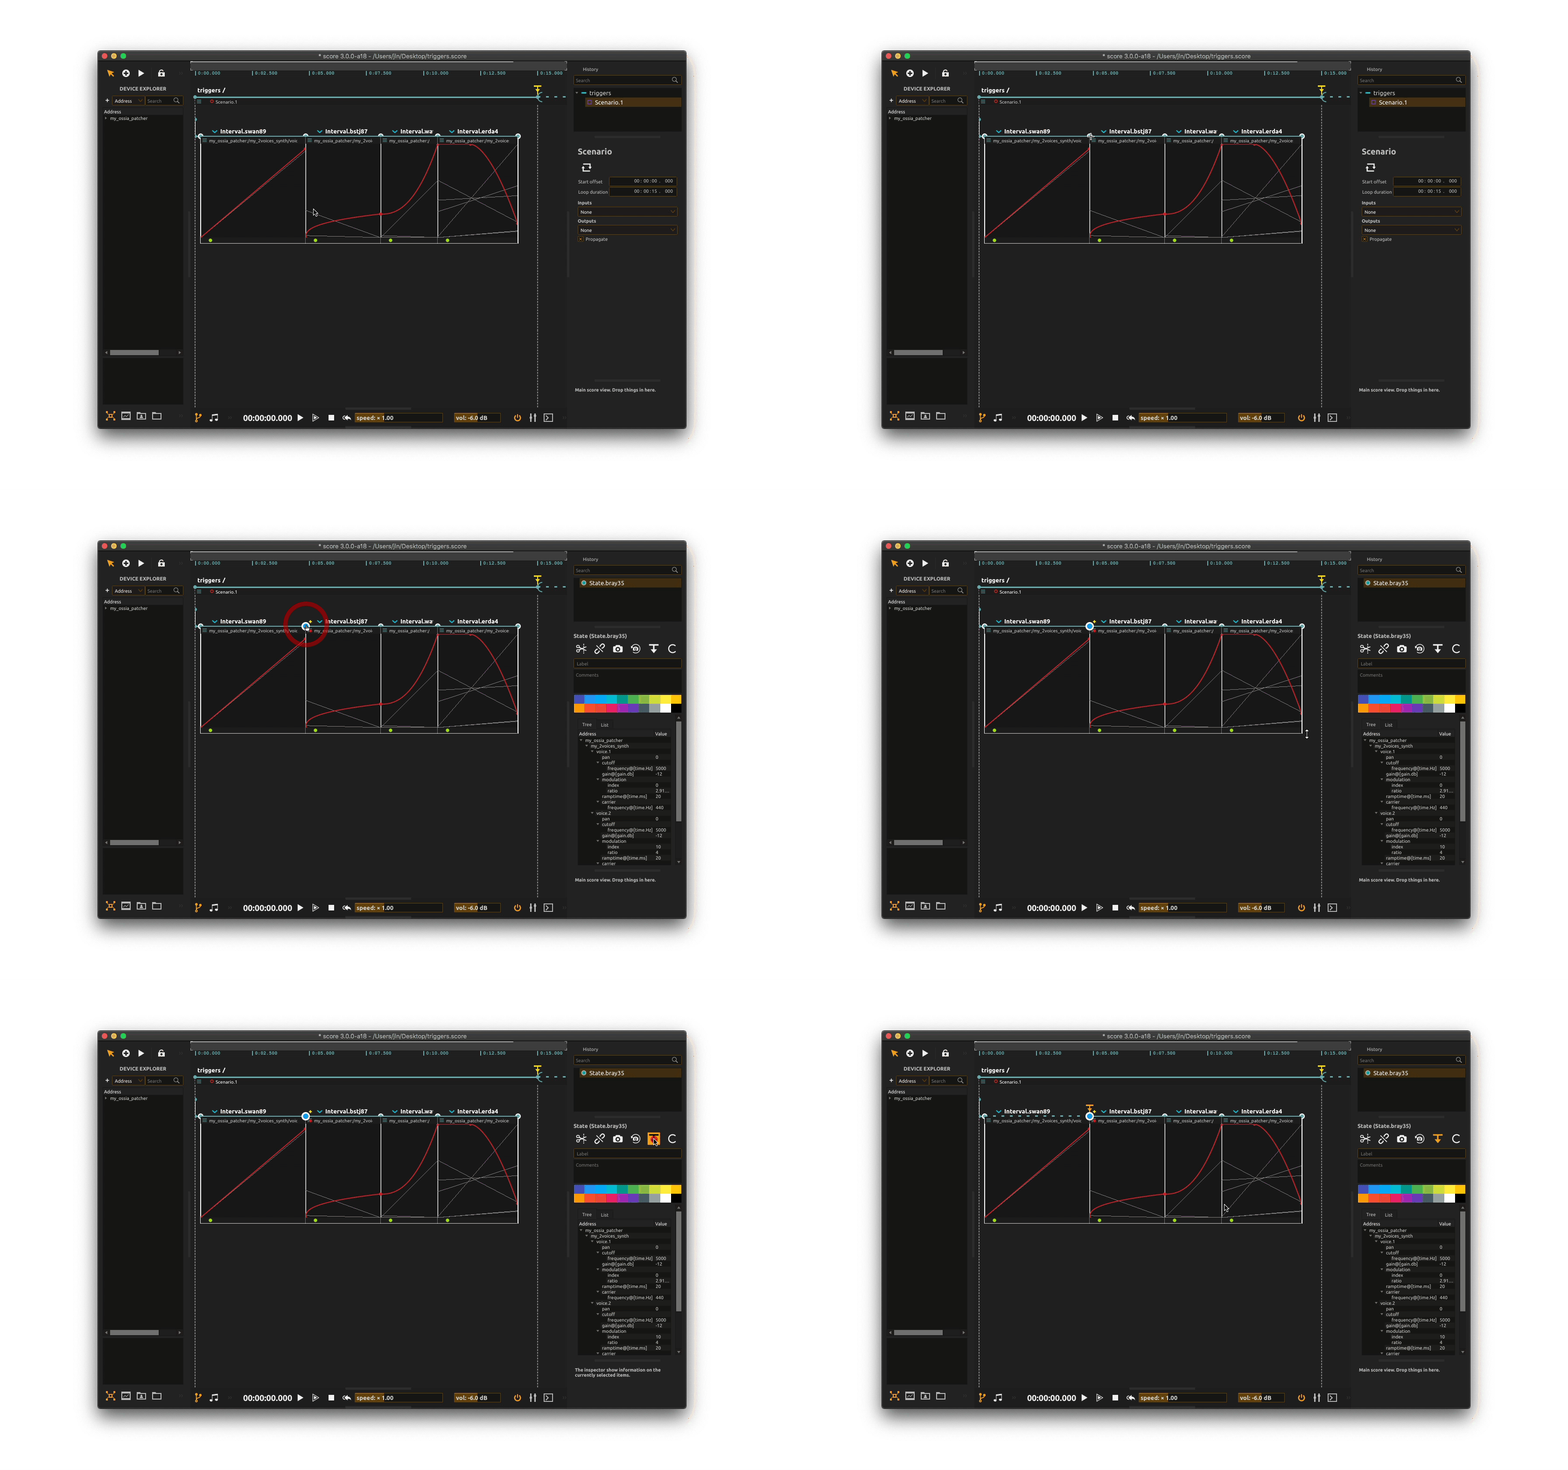
To add a trigger point, simply select a state on the scenario, then from its inspector, toggle on the trigger icon.

When turning on the trigger, you can see a T-like icon appearing on top of the selected state. You can also note that a dashed line appears on top of the preceding automation slot. This indicates that the duration of the preceding automations is now undefined: preceding automations will get executed up until the trigger is, well… triggered.
In the example above, the scenario start with a simple fade-in. Notice that it gets executed as the scenario play-head goes across the automation slot. While the scenario play-head continues its progression, you will notice though that the green progression bar at the top of the automation stops as it reaches the trigger point. Execution of the following automations is then on hold until the trigger point is triggered by a mouse click.
From then, execution follows its course until the next trigger point in the scenario. Here again, execution is put on hold until trigger point is clicked by mouse.
Triggers remote control
In the example above, we used the mouse to trigger the followup of the scenario execution. While convenient for demo purposes, you are more likely to rely on other inputs in creation situation such as some controller gear. You may use any parameter from your device as an input for trigger points.
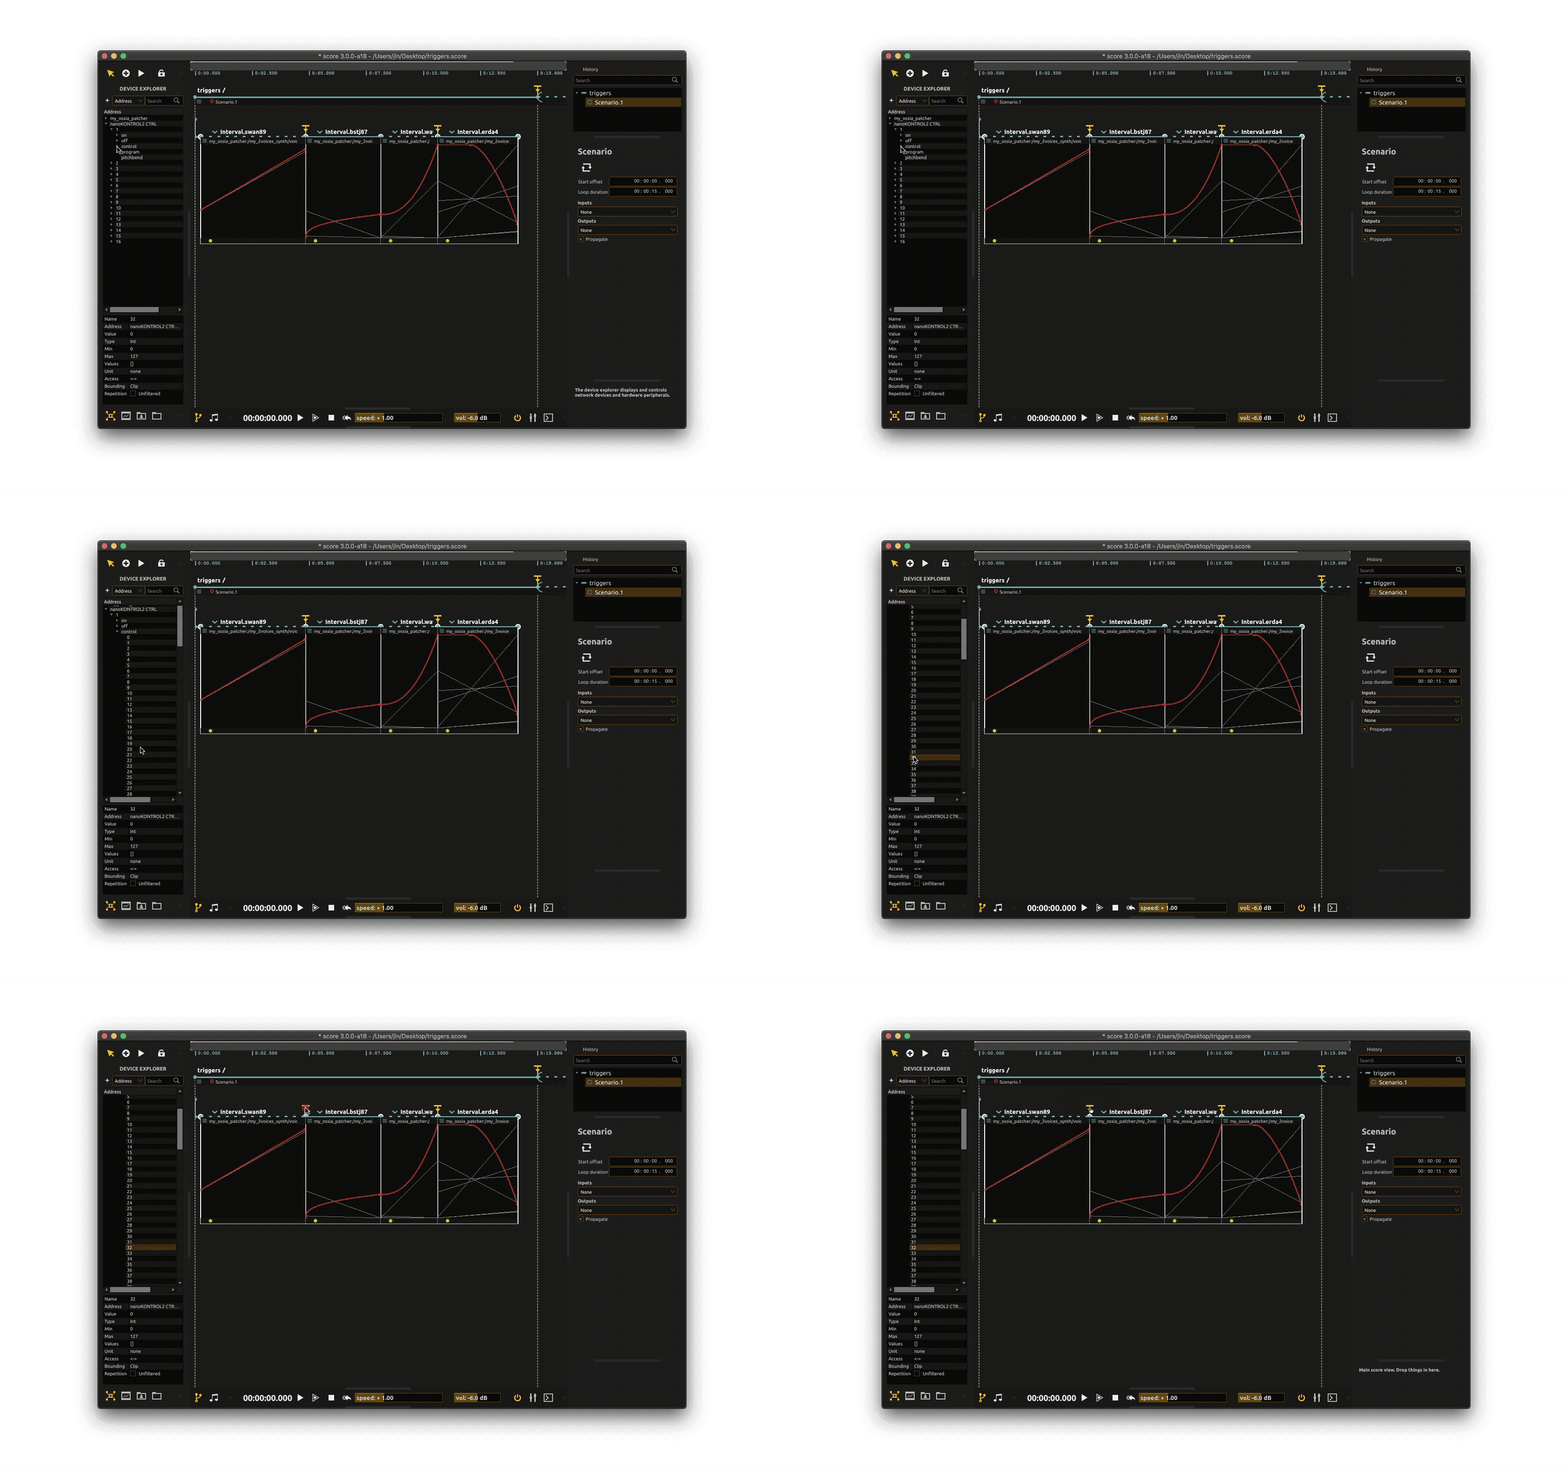
To set an input for a trigger point, just grab the desired parameter in the Device explorer and drop it on the trigger icon.

In the example above, we use as an input one button of a Korg nanoKontrol Midi controller. When done, you will see in the inspector the address of the dropped parameter in the address field.
You may also drop the parameter on the address field of the trigger point inspector.
When playing your scenario, part of your scenario will now get triggered as you press the dedicated button on your controller.