Score on the Store
Getting ossia score on the Microsoft Store
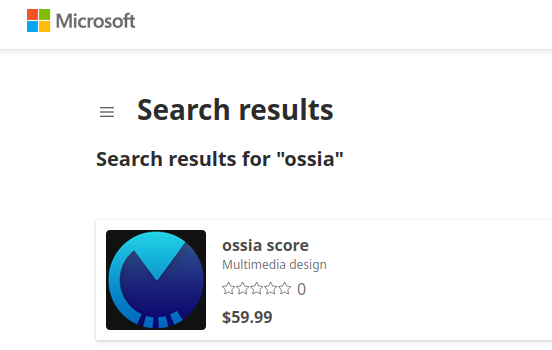
TL;DR: we released ossia score on the Microsoft Store, support and fund the development by buying it there!
ossia score is an interactive and intermedia sequencer: it allows to score multimedia content and processes in an interactive timeline, such as sound, MIDI, OSC messages, gamepad controls, video, VST plug-ins, scripts, with a specifically tailored visual language.
Technical details
What a drag this was! The Microsoft documentation is fairly complete, but also full of pretty old data – it is for instance not really clear how putting a Win32 app relates to UWP, to which version of UWP as the docs describes different ways between Windows 8 and Windows 10, etc.
But, in the end, we managed to get a reproducible procedure that I’m happily sharing here to allow other open-source software to be distributed there – it can be for instance mostly automated in Github Actions. In particular, it can likely be useful for anyone who uses a CMake / Qt / Clang toolchain (or any MinGW-ish toolchain) for building on Windows.
Prerequisites
- Visual Studio installed with the Windows SDK of your choice.
- An application that builds cleanly on Windows: running
cmake --build . --target installshould yield a clean installation folder with your app’s files. - A good few hours and roughly 3.5 liters of coffee and a couple liters of tea. Hopefully a bit less if you follow the steps below!
Steps
Account creation
First you need to register as a Microsoft Partner.
- Fill in your banking details, tax forms, etc etc.
- Create a new app, and set up the submission, description texts, etc etc.
Asset setup
A ton of different assets are required. Fortunately, it turns out that Visual Studio can generate them in the required format from a single base logo.
- Open Visual Studio.
- Create a new Windows UWP project, name it for instance
MyAppAssetsor something like this. - Click on the “Package.appxmanifest” on the file list on the left. This will open an UI editor for the manifest.
- Set up the properties in the first tab, then switch to the second tab.
- Set the source logo on the first field as explained here.
- Hit
Generate. TheAssetsfolder in the source directory should now contain all the generated PNGs at the right scales ; you can move them back to your repo and close VS.
Of course, one could also generate them from a well-thought-out imagemagick script, if anyone has one please share it!
Package manifest setup
This is the manifest that describes the package for your software. The one we made can likely be used as a source. Note that this is a .in file to indicate that we are generating it from CMake (to set the version number from the git tag, mainly).
You must in particular fill in the various identity-related variables that are available on the Microsoft Partner account:
Home > Apps and games > MyApp > Product management: Product Identity
Here you’ll see variables such as:
Package/Identity/Name                    # e.g. "com.yourcompany.yourapp"
Package/Identity/Publisher               # e.g. "C=SOME LONG UUID-ISH THING"
Package/Properties/PublisherDisplayName  # e.g. "Your Company"
which are to be copied in Package.appxmanifest’s <Identity> and <Properties>, as well as a few other places mentioned later in this post.
Important Package.appxmanifest details for Win32 apps
The important steps for Win32 app validation to pass are:
EntryPoint="Windows.FullTrustApplication"in<Application>.<rescap:Capability Name="runFullTrust" />in<Capabilities>.
XML funsies
A few “fun” stuff I encountered while writing the XML:
-
The order of capabilities apparently matters: the
<Capability ... />(and more generally anything of the form<namespace:Capability ... />) must come before the<DeviceCapability ... />ones in the<Capabilities>list. -
The order of namespaces in
IgnorableNamespaces="uap mp rescap uap2 uap3 rescap3"may or may not matter – I got weird errors with it. -
Depending on which “version” of the appxmanifest XML namespaces we are using, some elements are sometimes namespaced, sometimes not. It would not be an issue if everything on the internet was up-to-date, but you can’t expect to copy some steps from a 2017 StackOverflow answer and have things just work :p
Package layout XML
This file is used to describe all the sub-packages that compose your software: it can allow to do elaborate things such as providing a separate AMD64 and ARM64 pacakges, plus a separate asset package for the architecture-independent data such as images, sounds, etc.
The most important thing to notice is ManifestPath=".\manifests\Package.appxmanifest".
This has to be the path to Package.appxmanifest, relative to the folder from which you are going to run the packaging procedure.
e.g. If you run the packaging procedure from %YOUR_INSTALL_PREFIX%\ the Package.appxmanifest.in file will have to be configured as %YOUR_INSTALL_PREFIX%\manifests\Package.appxmanifest.
Application manifest
Yay, more XML! You also need to make sure that your main application executable has a valid manifest associated, with explicit high-DPI support.
We generate ours from CMake as at some point there’s likely going to be a version number in there too.
The important steps are:
-
Setting
dpiAwareanddpiAwareness(which are what different versions of windows will use). -
Indicate the supported Windows versions ; in our manifest for instance we support 7, 8, 8.1, 10 and 11. The UUIDs for various versions can be found here.
Generating the package
We now have all the data required for creating an .appxbundle. Apparently one can also generate a .msix / .msixbundle but, well, appx works!
Generating a certificate
The submission requires the code to be signed with a certificate, which matches the information provided by Microsoft:
Package/Identity/Name                    # e.g. "com.yourcompany.yourapp"
Package/Identity/Publisher               # e.g. "C=SOME LONG UUID-ISH THING"
Package/Properties/PublisherDisplayName  # e.g. "Your Company"
We can use Powershell to generate a self-signed one – thanks to OpenTTD for the example!
Here the subject and password are passed through Github secrets ; it’s not really necessary though as the certificate is regenerated for each build. From what I could read, Microsoft will then replace this certificate with their own once they validate the app and make it available to the store.
For instance, to generate a certificate for your own use on a dev machine, with the very strong password “toto”, it would look like:
$cert = New-SelfSignedCertificate `
  -Type Custom `
  -Subject "C=that-long-uuid-given-by-microsoft" `
  -KeyUsage DigitalSignature `
  -FriendlyName "friendly name given by microsoft" `
  -CertStoreLocation "Cert:\CurrentUser\My" `
  -TextExtension @("2.5.29.37={text}1.3.6.1.5.5.7.3.3", "2.5.29.19={text}")

Export-PfxCertificate `
  -cert "Cert:\CurrentUser\My\$($cert.Thumbprint)" `
  -FilePath c:\myapp\mycert.pfx `
  -Password toto
Be careful with rogue spaces, everything must be exactly as given on Microsoft’s website!
Once done you should have a certificate file generated in c:\myapp\mycert.pfx.
Packaging
- Start a
Visual Studio 2022 Native x64 Command Promptor whatever equivalent you have. - Go into your install folder (the one which contains your locally installed app, after
make installor whatever).
In it you should have:
- Your app’s .exe, for instance
myapp.exe. - Your app’s .exe.manifest (which we generated above with CMake though this is of course not the only way).
- Your app’s .DLLs, for instance
Qt6Core.dll. manifests/Package.appxmanifest
Then, we’ll follow the steps in that file.
- Remove all unwanted files or files from a previous build / packaging step.
- Create the resource files (here assuming a single language), used to indicate that e.g. all the
SmallTile.scale-XXX.pngfiles map to theSmallTile.pngreferenced inPackage.appmanifest:
> makepri createconfig /cf priconfig.xml /dq en-US
> makepri new /pr %cd% /cf %cd%\priconfig.xml /mn %cd%\manifests\Package.appxmanifest
- Embed the .exe.manifest in your .exe:
> mt -nologo -manifest myapp.exe.manifest -outputresource:"myapp.exe;#1"
- Sign all the executables and DLLs with the generated certificate: for instance, if the password for c:\myapp\mycert.pfx was “toto” as above, it would look like
> signtool sign /fd sha256 /a /f c:\myapp\mycert.pfx /p toto myapp.exe
> signtool sign /fd sha256 /a /f c:\myapp\mycert.pfx /p toto Qt6Core.dll
> etc...
- Build the package (finally!). The following command will put the resulting package in
c:\output.
> makeappx build /v /f c:\path\to\PackagingLayout.xml /op c:\output /ca
Note that if you made any mistake in the Package.appxmanifest, this will fail and you’ll have to dig through the errors to understand what went wrong… good luck!
- When you have a .appxbundle, you need to sign the package itself. The
x64.appxgenerated next to it can be entirely ignored.
> signtool sign /fd sha256 /a /f c:\myapp\mycert.pfx /p toto c:\output\my-app-package.appxbundle
If this step fails, it is likely that the Package.appxmanifest file’s fields (Publisher=, etc) do not match the information used while generating the certificate.
If it works, congrats, we can move on to testing!
Testing the packaged app
One thing that bugged me the most was allowing the .appxbundle to install as it requires Windows to trust the generated certificate (which it won’t just by generating it).
Installing the certificate
I read a lot of StackOverflow answers and none did work – e.g. adding the certificate manually from the generated .pfx file into Local Machine > Third-Party Root Certification Authorities or Root CAs, etc etc. What worked was right-clicking on the .appxbundle and adding the certificate from there (to the same location, Local Machine > Third-Party Root Certification Authorities) instead of from the .pfx file.
Running the app
From there the app can install by double-clicking the .appxbundle, and you can finally try to run it from the Start menu! If it works, we are nearly there. If it crashes, well, time to inspect some coredumps :-)
Checking with Windows App Cert Kit
This utility validates that the package is well-formed and does not have basic issues. The same checks will also be run by Microsoft when you submit your app so it’s a good idea to run it locally as it will be much faster – Microsoft will reject your app if it does not pass. Simply pass it your .appxbundle to ensure that it passes.
Note that you may have errors show up in the “Optional” section if your program calls child processes, etc. It won’t make the submission fail even if “error” is written in a scary red but apparently it will prevent your app from being installed on restricted Windows versions.
Note that if you really want your app to work there and you use Qt, you will likely have to rebuild Qt by passing
-no-feature-processto configure in order to disable the calls toCreateProcessthat are inQProcess’s implementation, even if you do not useQProcessdirectly. Likewise for any other dependency you use which may have calls toLoadProcessandShellExecute.
When it’s good, congrats, you can finally submit the package to the store and cross fingers for it to be quickly validated!